How to Compress Image Without Losing Quality
Discover proven techniques to reduce image file size by up to 90% while maintaining crystal-clear quality. Perfect for websites, blogs, and e-commerce stores.
Why Image Optimization is Critical in 2026
Website Speed Impact
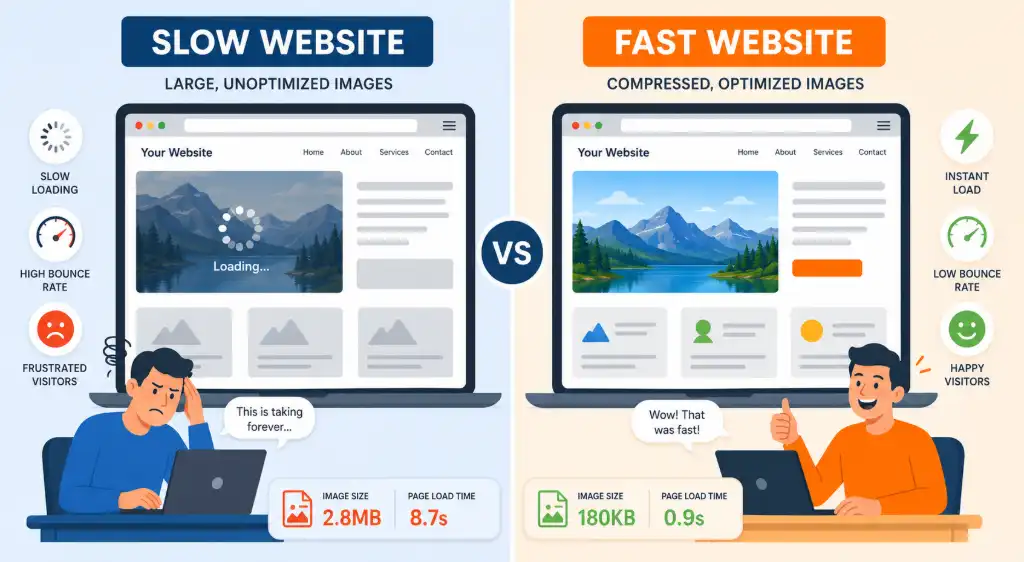
Images account for over 50% of total page weight. Unoptimized images can slow your website to a crawl, driving away 53% of mobile users who abandon pages taking longer than 3 seconds to load.
Storage Savings
Compressing images can reduce storage costs by up to 80%. For e-commerce sites with thousands of product photos, this translates to thousands of dollars saved annually on hosting and CDN costs.
User Experience
Fast-loading images improve engagement metrics. Pages with optimized images see 70% longer session durations and 35% lower bounce rates compared to sites with heavy, unoptimized visuals.
Whether you're a blogger, photographer, e-commerce entrepreneur, or web developer, learning how to compress image without losing quality is one of the most valuable skills you can develop. The good news? You don't need to be a tech wizard or invest in expensive software to achieve professional results.
💡 Quick Fact
According to Google, 53% of mobile site visitors leave pages that take longer than 3 seconds to load. Proper image compression can reduce load times by 70-90%, keeping your visitors engaged and improving your search rankings.
What Does Image Compression Actually Mean?
Understanding the fundamentals before diving into techniques
File Size Reduction
Compression reduces the amount of digital storage space an image requires. A typical smartphone photo might be 8-12 MB, but after compression, it can be just 500 KB-1 MB without visible quality loss.
Resolution vs Dimensions
Resolution refers to pixel density (DPI/PPI), while dimensions are the actual width and height in pixels. You can compress by reducing dimensions (resizing) or by optimizing the data without changing dimensions.
Compression Algorithms
Smart algorithms analyze image data and remove redundant information. Modern compressors use AI to identify which details matter and which can be safely discarded without affecting perceived quality.
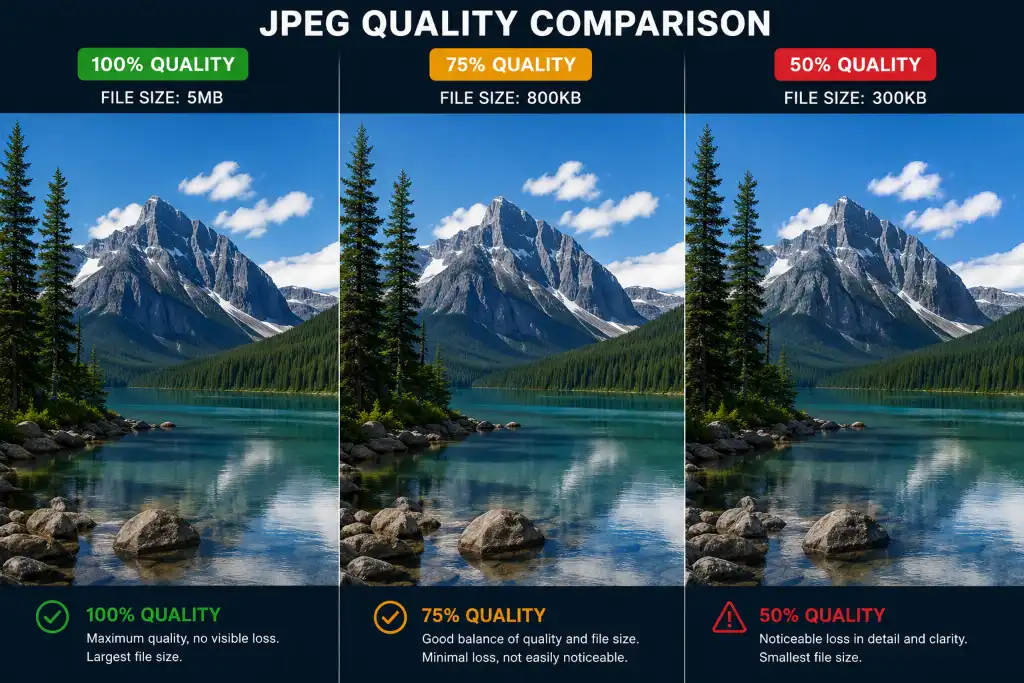
📊 Real-World Example
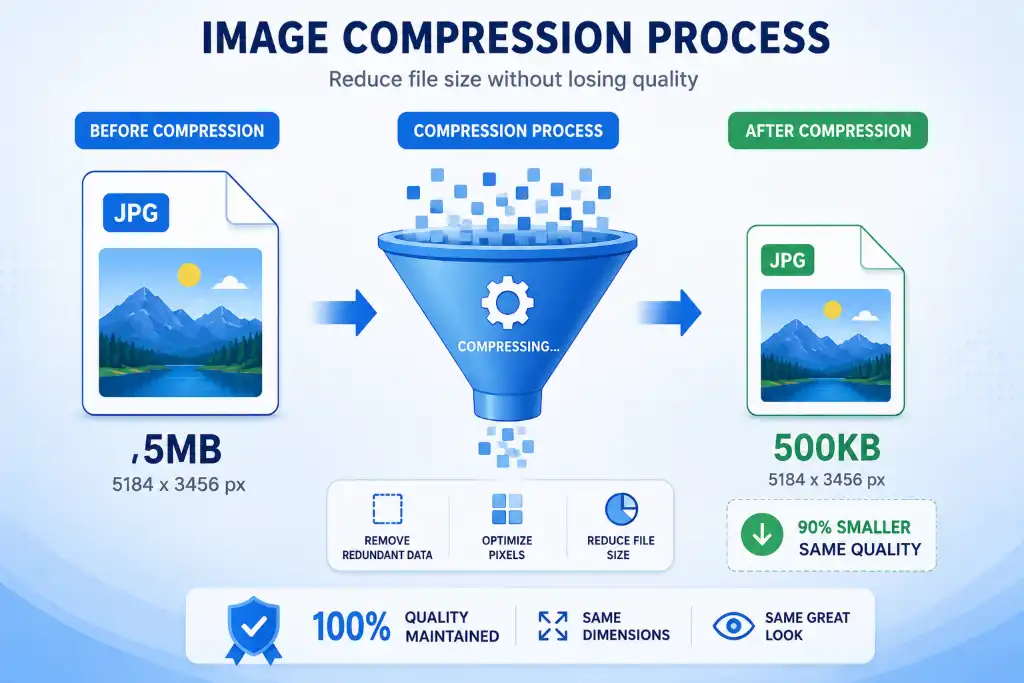
Before Compression: 5 MB JPEG (4000×3000 pixels, 300 DPI)
After Compression: 500 KB JPEG (1920×1080 pixels, 72 DPI)
Quality: Visually identical on screens, 90% smaller file size
Can You Really Compress Without Losing Quality?
The truth about lossless vs lossy compression
Lossless Compression
Perfect for: Logos, screenshots, images with text, medical imaging
How it works: Finds and eliminates statistical redundancy without removing any image data. The decompressed image is bit-for-bit identical to the original.
Formats: PNG, WebP (lossless), GIF, TIFF
Compression ratio: 20-50% reduction
Lossy Compression
Perfect for: Photographs, blog images, product photos
How it works: Selectively removes less important data that human eyes are less likely to notice. Achieves much higher compression ratios.
Formats: JPEG, WebP (lossy), AVIF, HEIC
Compression ratio: 70-90% reduction
| Feature | Lossless Compression | Lossy Compression |
|---|---|---|
| Quality | Perfect (100%) | Near-Perfect (90-99%) |
| File Size | Moderate reduction | Significant reduction |
| Best For | Graphics, text, logos | Photos, natural images |
| Re-compression | Safe (no quality loss) | Avoid (cumulative loss) |
| Transparency | Supported | Limited support |
For most websites, a hybrid approach works best: use lossy compression for photographs (JPEG/WebP) and lossless for graphics with transparency (PNG/WebP). This gives you the best balance of quality and file size.
Best Ways to Compress Images Without Losing Quality
Five proven methods used by professionals
Use Online Image Compressor Tools
The fastest and easiest method requires no software installation. Simply upload your image, choose compression settings, and download the optimized version. Tools like ImageToolsZone's compressor use advanced algorithms to reduce file size while preserving visual quality. Perfect for quick one-off compressions or batch processing multiple images at once.
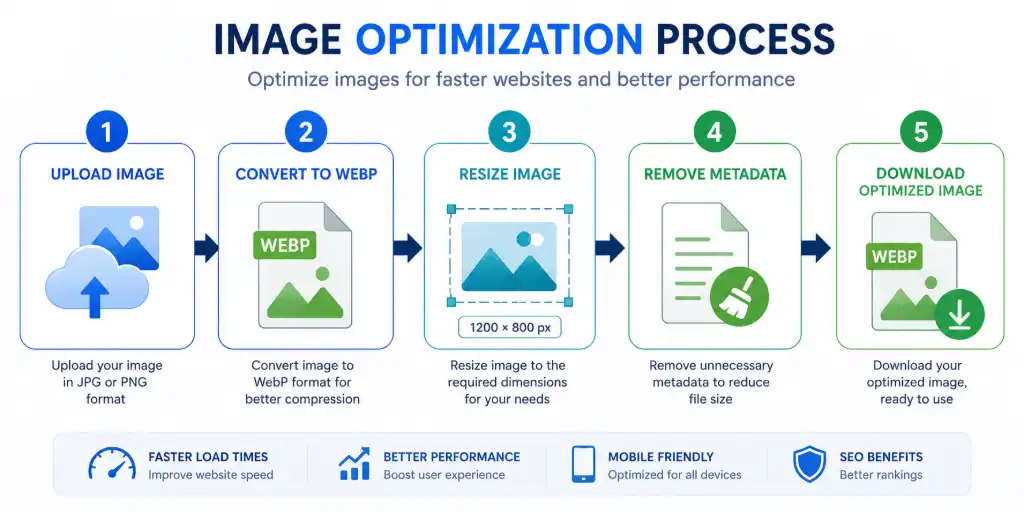
Convert to WebP Format
WebP is Google's modern image format that provides superior compression compared to JPEG and PNG. WebP images are typically 25-35% smaller than JPEGs at equivalent quality levels. The format supports both lossy and lossless compression, transparency, and animation. Most modern browsers support WebP, making it ideal for web use.
Resize Large Images to Display Dimensions
One of the biggest mistakes is uploading a 4000×3000 pixel image when it will only display at 800×600 on your website. Resize images to their actual display dimensions before uploading. For example, if your blog content area is 1200 pixels wide, resize images to 1200px width (or 2400px for retina displays). This simple step can reduce file size by 70-80%.
Remove Metadata (EXIF Data)
Digital cameras and smartphones embed metadata in images including camera settings, GPS location, date/time, and device information. This EXIF data can add 50-500 KB to your files. Unless you specifically need this information, strip it out during compression. Most online compressors offer an option to remove metadata automatically.
Use Modern Compression Formats
Move beyond traditional JPEG and PNG. Modern formats like AVIF and WebP offer dramatically better compression. AVIF can reduce file sizes by 50% compared to JPEG while maintaining superior quality. For maximum compatibility, use WebP with JPEG fallbacks. If you need to resize images to exact dimensions before format conversion, do that first for best results.
Step-by-Step Guide to Compress Images
Follow this simple process for perfect results every time
Upload Your Image
Start by uploading your image to a reliable compression tool. Most tools support drag-and-drop functionality for convenience. You can typically upload multiple images at once for batch processing. Supported formats usually include JPEG, PNG, WebP, and sometimes GIF or BMP.
Supported Formats
JPG, PNG, WebP, GIF, BMP, TIFF, HEIC
Select Compression Level
Choose your compression settings based on your needs:
• Low Compression (80-100% quality): Best for professional photography, portfolios
• Medium Compression (60-80% quality): Ideal for blogs, e-commerce, social media
• High Compression (40-60% quality): Good for thumbnails, previews, fast-loading pages
Most tools show a preview so you can see the quality before downloading.
Preview and Compare
Always preview your compressed image before downloading. Good compression tools provide a side-by-side comparison slider so you can see the original vs compressed version. Zoom in to check fine details, text clarity, and color accuracy. If quality looks unacceptable, adjust the compression level and try again.
Download Optimized Image
Once satisfied with the results, download your compressed image. Many tools allow you to download individual files or a ZIP archive for batch compressions. Some advanced tools also let you choose the output format, rename files, or specify the download location.
Try Our Compressor Tool →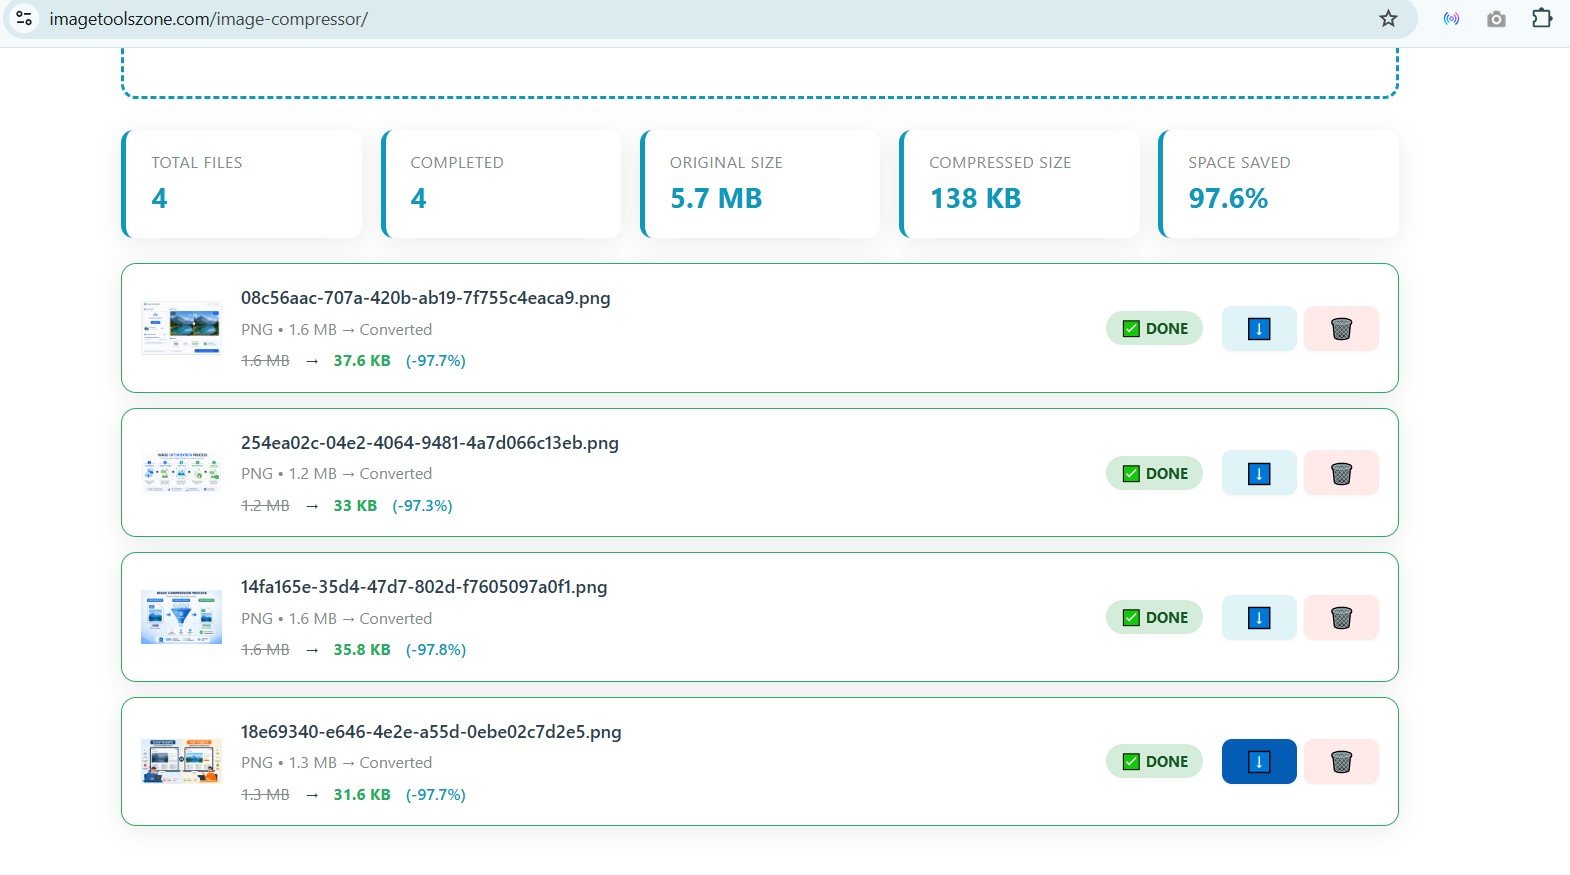
How to Compress JPG Without Losing Quality
Optimize your photographs and blog images
Photography
For professional photos, use 80-90% quality setting. This maintains excellent detail while reducing file size by 60-70%. For web galleries, 70-80% works well. Always resize to display dimensions first—a 24MP photo doesn't need to be 6000 pixels wide on a website.
Blog Images
Blog featured images should be compressed to 60-75% quality. This provides the best balance between visual appeal and fast loading. For inline content images, you can go as low as 50-60% quality without noticeable degradation on standard screens.
Product Photos
E-commerce product images need to look sharp to drive sales. Use 75-85% quality for main product shots. For thumbnail galleries, 60-70% is sufficient. Consider using WebP format with JPEG fallback for the best performance across all devices and browsers.
🎯 JPEG Compression Sweet Spot
For most use cases, 75% quality provides the optimal balance. You'll achieve 70-80% file size reduction while maintaining visual quality that's indistinguishable from the original to the human eye.
How to Compress PNG Without Losing Quality
Perfect for logos, graphics, and transparent images
When to Use PNG
PNG is ideal for images with text, sharp edges, logos, screenshots, and graphics requiring transparency. Unlike JPEG, PNG uses lossless compression, so you won't lose quality. However, PNG files are typically larger than JPEGs for photographs.
Logos & Branding
Logos require crisp edges and often transparency. Use PNG-24 for full color with alpha transparency, or PNG-8 for simpler logos with fewer colors. Tools like circle crop or oval shape crop can help create perfectly shaped logo variations before compression.
Transparent Images
PNG is the go-to format for transparency. When compressing, use tools that preserve the alpha channel. Reduce color palette if possible—many transparent graphics don't need 16 million colors. Reducing to 256 colors (PNG-8) can cut file size by 60% while maintaining transparency.
Graphics & Icons
For icons and UI graphics, consider using SVG instead of PNG when possible. SVG is vector-based and infinitely scalable. If you must use PNG, compress with lossless algorithms. Tools that offer custom shape cropping can help optimize graphics for specific layouts.
For PNG files, try converting to PNG-8 with a reduced color palette if your image has fewer than 256 colors. This can reduce file size by 70% or more while maintaining perfect visual quality. Many online compressors automatically optimize the color palette for you.
How to Compress WebP Images
The modern format that's changing the web
Why WebP is Preferred
WebP offers both lossy and lossless compression in a single format. Lossy WebP is 25-35% smaller than JPEG at equivalent quality. Lossless WebP is 26% smaller than PNG. WebP also supports transparency (like PNG) and animation (like GIF), making it incredibly versatile.
Google's Recommendation
Google developed WebP specifically for the web, and it's now the recommended format in PageSpeed Insights and Lighthouse audits. Using WebP can improve your Core Web Vitals scores, particularly Largest Contentful Paint (LCP), which is a ranking factor.
Browser Support
As of 2026, WebP has 97% browser support globally. All major browsers including Chrome, Firefox, Safari, and Edge support WebP. For the 3% that don't, implement fallback images using the HTML picture element or server-side content negotiation.
📊 WebP Compression Stats
Lossy WebP: 25-35% smaller than JPEG
Lossless WebP: 26% smaller than PNG
Transparent WebP: 3x smaller than PNG with transparency

Best Image Compression Formats Compared
Choose the right format for your specific needs
| Format | Quality | Compression | Transparency | Best Use Case |
|---|---|---|---|---|
| JPEG/JPG | Good (Lossy) | High (70-90%) | No | Photographs, blog images |
| PNG | Excellent (Lossless) | Medium (20-50%) | Yes | Logos, graphics, screenshots |
| WebP | Excellent | Very High (75-95%) | Yes | Modern websites, all-purpose |
| AVIF | Excellent | Highest (80-95%) | Yes | Cutting-edge websites |
| GIF | Limited (256 colors) | Low-Medium | Yes | Simple animations |
| SVG | Perfect (Vector) | Excellent for graphics | Yes | Icons, logos, illustrations |
While AVIF offers the best compression, browser support is still around 80% as of 2026. Use AVIF with WebP or JPEG fallbacks for maximum compatibility. For critical images, stick with WebP which has near-universal support.
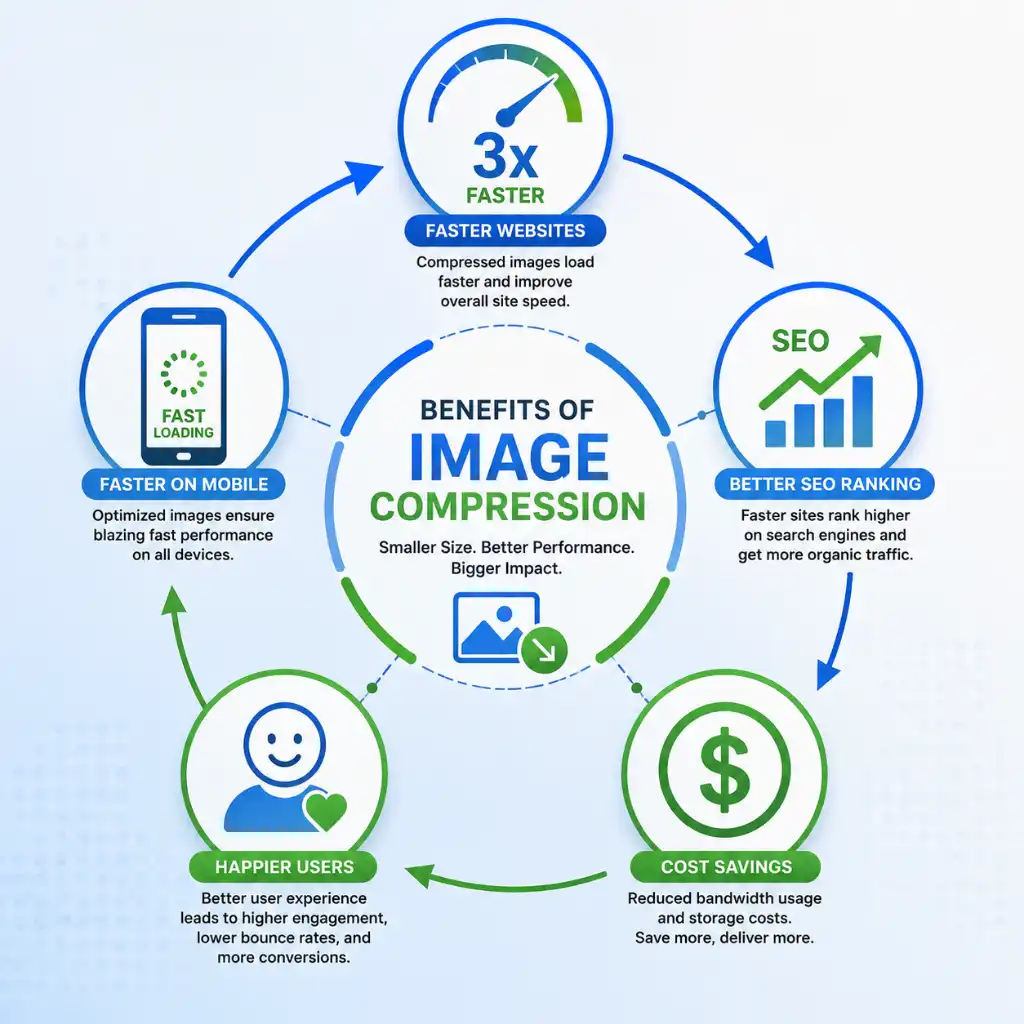
Benefits of Compressing Images
Why image optimization matters for your success
Faster Website Speed
Compressed images load 3-5x faster than uncompressed ones. This directly impacts user experience—visitors are 70% more likely to stay on fast-loading pages. Every second of load time improvement can increase conversions by 7%.
Better SEO Rankings
Page speed is a confirmed Google ranking factor. Optimized images improve Core Web Vitals scores, particularly Largest Contentful Paint (LCP). Sites with optimized images rank higher and receive 40% more organic traffic on average.
Better Core Web Vitals
Image optimization directly impacts three Core Web Vitals: LCP (loading performance), CLS (visual stability), and FID (interactivity). Properly compressed images help you pass Google's Core Web Vitals assessment, which affects search rankings.
Reduced Storage Costs
Smaller images mean lower hosting costs and reduced CDN bandwidth usage. For high-traffic sites, image optimization can save hundreds or thousands of dollars monthly on infrastructure costs.
Faster Uploads
Compressed images upload faster to your CMS, social media platforms, or cloud storage. This saves time when managing large image libraries or updating content regularly.
Improved User Experience
Fast-loading images keep visitors engaged. Mobile users on slow connections particularly benefit from optimized images. Better UX leads to lower bounce rates, longer sessions, and higher conversion rates.
Common Mistakes to Avoid
Don't make these image optimization errors
Never compress an already compressed image, especially with lossy formats like JPEG. Each compression cycle degrades quality further. Always work from the original source file. If you need to recompress, start from the original upload.
Don't save photographs as PNG (huge file sizes) or logos as JPEG (poor quality with artifacts). Match the format to the content type: JPEG/WebP for photos, PNG/WebP for graphics with transparency, SVG for logos and icons.
Uploading a 6000px wide image when it displays at 800px is wasteful. Resize images to their maximum display dimensions before compressing. For retina displays, 2x the display size is sufficient (e.g., 1600px for an 800px display area).
Over 60% of web traffic comes from mobile devices. Optimize images specifically for mobile with responsive images using srcset attributes. Serve smaller images to mobile devices to improve load times on cellular networks.
Compressing too aggressively creates visible artifacts, blockiness, and color banding. Always preview compressed images at 100% zoom before publishing. If you see quality degradation, increase the quality setting. It's better to have a slightly larger file than an ugly image.
Always keep your original, uncompressed images in a backup folder. You can always compress again with different settings, but you can't recover quality lost to over-compression. Use descriptive filenames like "product-name-original.jpg" and "product-name-web.jpg" to avoid confusion.
Best Tools to Compress Images
Top-rated compression tools compared
ImageToolsZone Compressor
Our recommended tool offers excellent compression ratios with an intuitive interface. Supports all major formats including WebP and AVIF. No registration required, processes images directly in your browser for privacy. Perfect for both beginners and professionals.
Try ImageToolsZone Compressor →TinyPNG / TinyJPG
Popular choice for PNG and JPEG compression. Uses smart lossy compression techniques. Free tier allows 20 images at once, max 5MB each. Pro version offers more features. Good quality but limited batch processing on free tier.
Squoosh (by Google)
Browser-based tool with impressive compression options. Offers real-time comparison slider, supports modern formats like AVIF and MozJPEG. Great for tech-savvy users who want fine control over compression settings. No batch processing.
ImageOptim
Excellent desktop application for Mac users. Drag-and-drop interface, batch processing, removes metadata automatically. Combines multiple optimization tools for best results. Not available for Windows or web.
ShortPixel
Powerful compressor with WordPress integration. Offers lossy, glossy, and lossless options. Free tier: 100 images/month. Great for website owners who want automatic optimization. Also offers API for developers.
| Tool | Free | Batch Processing | Quality | Best For |
|---|---|---|---|---|
| ImageToolsZone | Yes | Yes | Excellent | All users |
| TinyPNG | Limited | Limited | Good | Quick compression |
| Squoosh | Yes | No | Excellent | Advanced users |
| ImageOptim | Yes | Yes | Excellent | Mac users |
Image Compression for SEO
How optimization affects your search rankings
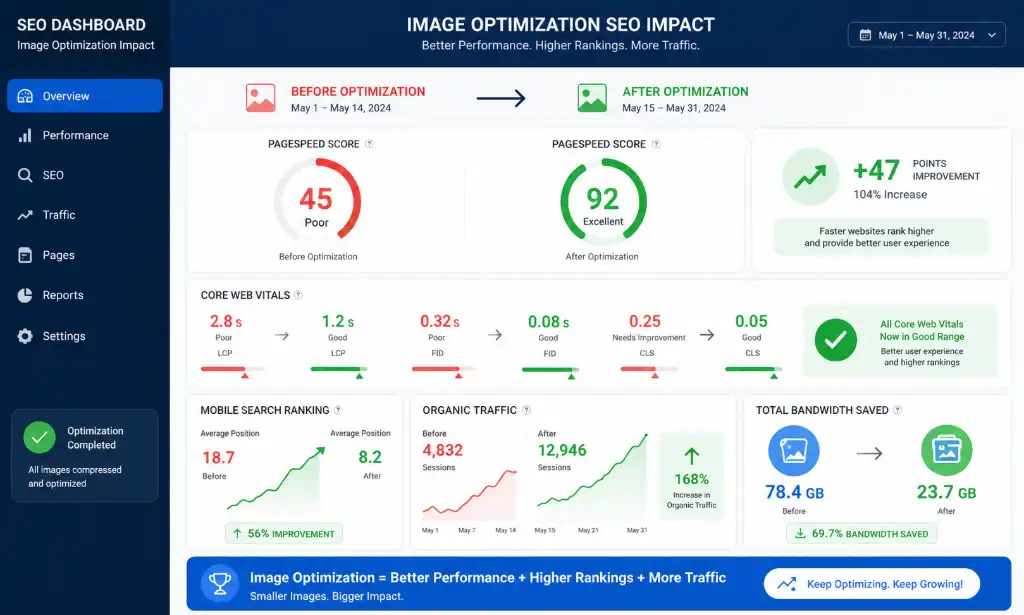
PageSpeed Insights
Google's PageSpeed Insights specifically flags unoptimized images as a performance issue. Properly compressed images can improve your score by 20-40 points. Higher scores correlate with better search rankings and increased organic traffic.
Enhance Images →Core Web Vitals
Largest Contentful Paint (LCP) measures loading performance and should be under 2.5 seconds. Images are often the LCP element. Compressed images help you pass this metric, which is a confirmed Google ranking factor since 2021.
Mobile Ranking
Google uses mobile-first indexing, meaning it primarily uses the mobile version of your site for ranking. Mobile users often have slower connections, making image optimization even more critical for mobile SEO performance.
Image Search Traffic
Optimized images can rank in Google Image Search, driving additional traffic to your site. Use descriptive filenames, alt text, and proper compression. Fast-loading images are more likely to be featured in image search results.
📈 SEO Impact Statistics
• Sites with optimized images rank 15-20% higher on average
• Every 1-second improvement in load time increases conversions by 7%
• 53% of mobile users abandon sites taking longer than 3 seconds
• Image search drives 20-30% of total search traffic for visual content sites
Ready to Optimize Your Images?
Start compressing your images today and see immediate improvements in website speed, user experience, and search rankings. No registration required, completely free to use.
Compress Images Now →Frequently Asked Questions
Everything you need to know about image compression
To reduce image size while maintaining quality, use these techniques: 1) Convert to WebP format for 25-35% smaller files, 2) Resize images to actual display dimensions, 3) Use smart compression tools that preserve visual quality, 4) Remove unnecessary metadata, and 5) Choose 75-85% quality for JPEGs. Tools like ImageToolsZone compressor use advanced algorithms to maintain perceived quality while significantly reducing file size.
WebP is currently the best all-around format for websites in 2026. It offers superior compression (25-35% smaller than JPEG), supports transparency like PNG, and has 97% browser support. For photographs, use WebP or JPEG. For graphics with transparency, use WebP or PNG. For logos and icons, SVG is ideal. Implement WebP with JPEG/PNG fallbacks for maximum compatibility.
Yes, WebP is generally better than JPG for web use. WebP files are 25-35% smaller at equivalent quality levels, load faster, and support transparency (which JPEG doesn't). WebP also offers both lossy and lossless compression options. The only downside is slightly less universal browser support (97% vs JPEG's 100%), but this is rarely an issue in 2026. Always provide JPEG fallbacks for older browsers.
Compression level depends on use case: For professional photography portfolios, use 80-90% quality. For blog posts and e-commerce, 70-80% is ideal. For thumbnails and background images, 60-70% works well. Always preview compressed images at 100% zoom to ensure quality is acceptable. Aim for file sizes under 200KB for standard images and under 500KB for large hero images.
Yes, image compression significantly affects SEO. Optimized images improve page load speed, which is a Google ranking factor. They help you pass Core Web Vitals (particularly Largest Contentful Paint), improve mobile performance, and enhance user experience—all of which influence search rankings. Sites with optimized images typically rank 15-20% higher and receive more organic traffic.
Absolutely! Many excellent free tools exist for image compression. ImageToolsZone offers free compression with no watermarks, no registration, and batch processing. Other free options include Squoosh (by Google), TinyPNG (limited to 20 images), and ImageOptim (Mac only). These free tools provide professional-quality compression suitable for most users. Paid versions typically offer API access, higher volume limits, or additional features.
Professional photographers typically: 1) Export from Lightroom or Photoshop at 75-85% JPEG quality, 2) Resize to 2048-3000px on the long edge for web display, 3) Use specialized tools like ImageOptim or JPEGmini for additional compression, 4) Convert to WebP for web portfolios, 5) Maintain original RAW files separately. They balance quality and file size carefully, often using 80% quality as the sweet spot for client galleries and portfolios.
Lossless compression reduces file size without any quality loss. The decompressed image is bit-for-bit identical to the original. It works by finding and eliminating statistical redundancy in the data. Formats like PNG, GIF, and lossless WebP use this method. Lossless compression typically achieves 20-50% size reduction—less than lossy compression but perfect for images requiring exact quality like logos, screenshots, and medical imaging.
Large file sizes after compression usually mean: 1) Image dimensions are too large—resize to display size first, 2) You're using PNG for photographs—switch to JPEG or WebP, 3) Compression level is too high (quality too low paradoxically increases size for complex images), 4) Image has unnecessary metadata—strip EXIF data, or 5) Image is already compressed—don't compress twice. Always resize before compressing for best results.
Always compress images before uploading to WordPress. Uploading uncompressed images wastes bandwidth, storage space, and processing power. WordPress does create thumbnail sizes, but the original upload remains at full size. Pre-compress images to 70-80% quality and resize to maximum display dimensions (typically 1920px wide for full-width images). You can also use WordPress plugins like ShortPixel or Smush for additional optimization after upload.
Ideal dimensions vary by use: Full-width hero images: 1920×1080px (or 2560px for 4K), Blog featured images: 1200×630px, Content images: 800-1200px wide, Thumbnails: 300×300px, Product images: 1000×1000px minimum. For file size, aim for under 200KB for standard images, under 500KB for large hero images. Always serve responsive images using srcset for different screen sizes.
Yes! Use PNG or WebP formats to preserve transparency. JPEG doesn't support transparency. For PNG files, use lossless compression or PNG-8 with alpha transparency for smaller files. WebP supports transparency with much better compression than PNG—typically 3x smaller. Tools like ImageToolsZone compressor maintain transparency while reducing file size. Always preview transparent images against different backgrounds to ensure quality.
Use tools that support batch processing: 1) ImageToolsZone allows uploading multiple images at once, 2) Desktop apps like ImageOptim (Mac) or FileOptimizer (Windows) process folders of images, 3) WordPress plugins like Smush optimize media library in bulk, 4) Command-line tools like ImageMagick for developers. Batch compression saves time when optimizing entire photo libraries or e-commerce product catalogs. Most free tools limit batch size to 20-50 images.
AVIF (AV1 Image File Format) is the newest image format offering the best compression available—50% smaller than JPEG at equivalent quality. It supports both lossy and lossless compression, HDR, and transparency. Browser support is around 80% as of 2026 (Chrome, Firefox, Opera yes; Safari partial). Use AVIF with WebP/JPEG fallbacks for cutting-edge performance. It's ideal for photography sites where every KB matters, but WebP remains safer for maximum compatibility.
For email, compress images more aggressively: Use 60-70% JPEG quality, resize to 600-800px width (email clients display narrower), aim for under 100KB per image, and limit total email size to 1MB. Most email clients block large attachments. For email newsletters, use WebP or JPEG format, avoid PNG unless transparency is essential. Tools like ImageToolsZone can quickly optimize images specifically for email marketing campaigns.
At proper compression levels (70-85% for JPEG), quality reduction is typically imperceptible to the human eye on standard screens. Visible artifacts only appear with aggressive compression (below 50% quality) or when viewing at 100% zoom. The key is finding the sweet spot where file size is minimized but quality remains acceptable for your use case. Always preview compressed images before publishing, and when in doubt, use slightly higher quality settings.