
Add Watermark to Image Without Losing Quality – Fast & Free Online Tool
Protecting your visual assets online shouldn't force you to compromise on clarity or crispness. With our browser-based utility, you can easily add watermark to image without losing quality. Whether you need to append a sleek text watermark, embed a high-resolution transparent logo, stamp a custom brand signature, or display your website URL across photographs, our system processes everything directly on your client side. You preserve exact image dimensions, original color profiles, and sharp detail without suffering from ugly compression artifacts or pixelation.
- 1. How to Add a Watermark to an Image Online
- 2. Watermarking Without Losing Image Quality
- 3. Add a Logo Watermark to an Image
- 4. Add Text Watermark to a Photo
- 5. Why Add a Watermark to Your Images?
- 6. Best Watermark Placement for Photos
- 7. Choosing the Right Watermark Opacity
- 8. Watermark JPG, PNG, and WebP Images
- 9. Who Can Use an Online Watermark Tool?
- 10. Online Watermark Tool vs. Photoshop
- 11. How to Make a Professional Watermark
- 12. Common Watermarking Mistakes to Avoid
- 13. Explore Related Image Processing Tools
- 14. Frequently Asked Questions (FAQs)
How to Add a Watermark to an Image Online
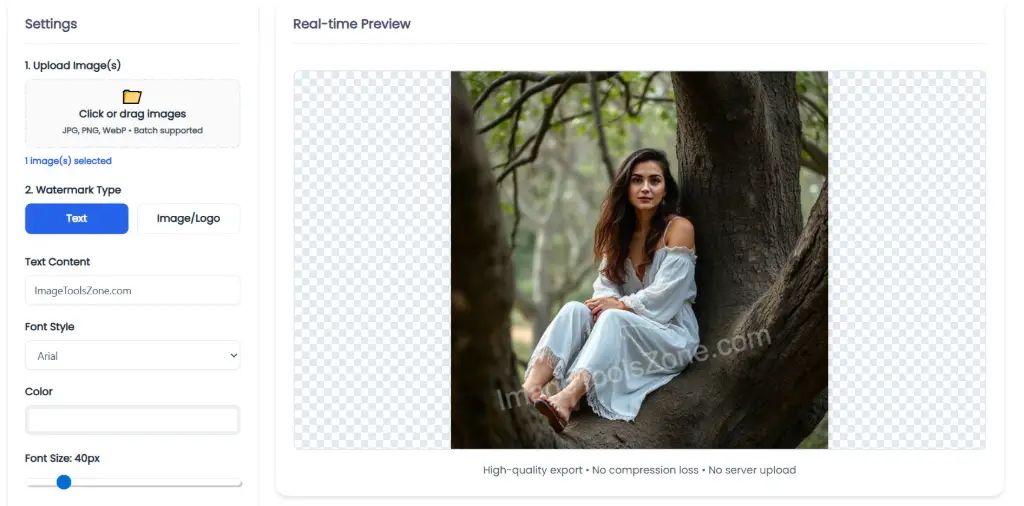
Securing your visual media should not require installing heavy software packages or navigating convoluted menus. Our tool streamlines the workflow into an instant, browser-based process. Here is the complete step-by-step breakdown using the modern controls embedded directly in our online editor interface:
Upload Your Source Image(s)
Begin by dragging and dropping your files into the designated drop zone or clicking the upload panel. The tool accepts JPG, PNG, and WebP formats, supporting single image editing as well as instant batch processing. To ensure maximum visual fidelity, always begin with your original high-resolution master file.
Select Your Watermark Type
Choose between a Text watermark or an Image/Logo watermark depending on your branding goals. If you choose text, type your business name, copyright string, or URL directly into the text content field. If you choose a logo, select a high-resolution transparent PNG file.
Customize Typography, Color, and Styling
For text overlays, choose your preferred font family (such as Arial) from the dropdown selector. Select custom colors, enable sharp text outlines, or toggle a drop shadow to maintain contrast across bright or busy photo backgrounds.
Fine-Tune Appearance (Scale, Opacity, & Rotation)
Utilize the interactive sliders under the Appearance panel. Adjust the Opacity slider (e.g., 20% for subtle protection or higher for bold visibility). Fine-tune the overall Scale to match your photo layout, and modify the Rotation angle (e.g., -30° diagonal angle) to deter unauthorized cropping.
Apply Quick Presets or Position Manually
Speed up your production using one-click Quick Presets such as Copyright, Confidential, Draft, or Social Media. Position the element directly where you want it on the interactive canvas.
Preview and Export High-Resolution Master
Review the final result on the real-time canvas preview. Once satisfied, click the blue Download button to export your newly protected image in its original crisp quality instantly.
How to Add a Watermark Without Losing Image Quality
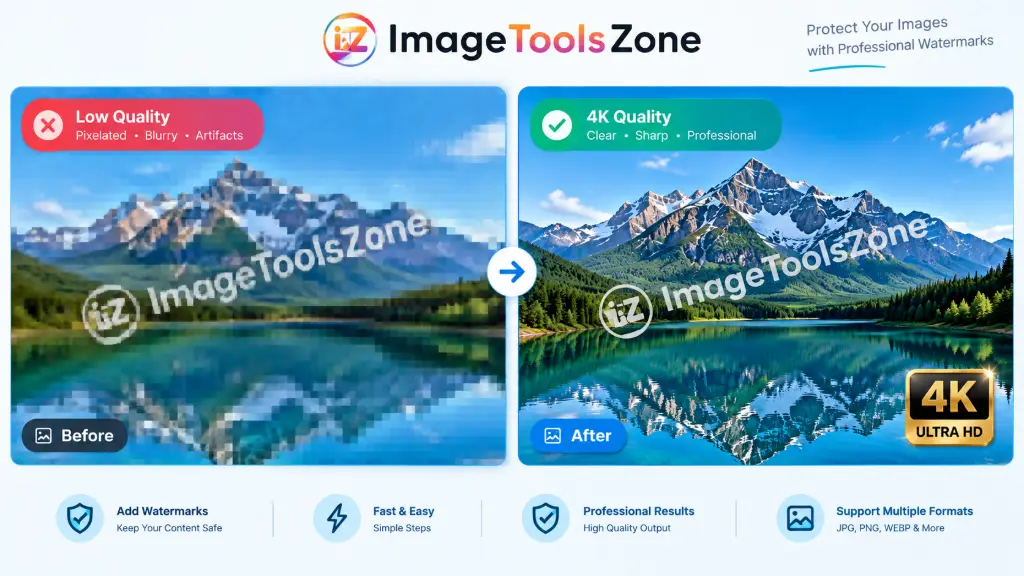
A common issue with standard photo editing web applications is the aggressive re-compression that degrades your photo's fidelity. When you attempt to watermark image without losing quality, preserving raw pixel integrity, color depth, and contrast requires adhering to fundamental image processing principles.
Start with Raw/High-Res Source Files
Garbage in, garbage out. Always begin your editing workflow with the highest resolution original image possible. Uploading a heavily compressed source file means that any added overlay will emphasize existing blocky artifacts.
Avoid Unnecessary Canvas Resizing
Do not downscale your photograph's pixel dimensions prior to applying your watermark. Apply your text overlay or logo graphic at full scale, then export the file directly. If you must scale the photo down for specific site requirements, do it in a single export step.
Use Transparent Vector/PNG Logos
When executing an add logo to image without losing quality task, avoid low-resolution JPEGs with white box borders. Always import high-resolution, transparent background PNG files or SVG-derived images. This ensures seamless blend modes with no pixel fringing around text edges.
Prevent Cumulative Re-Compression
Repeatedly opening, editing, and resaving JPEG files introduces cumulative generation loss. Our web editor processes your image within local browser memory using HTML5 Canvas graphics acceleration, saving the final file in a single render pass to eliminate mid-stage compression degradations.
When learning how to watermark photos without losing quality, always verify your exported file at 100% zoom level before pushing it live to your website, online store, or portfolio gallery.
Add a Logo Watermark to an Image
For commercial photographers, visual artists, e-commerce brand managers, and digital agencies, establishing brand ownership requires a clean corporate mark overlay. Our tool serves as a dedicated add logo to image free tool that seamlessly blends your visual identity onto your assets.
To execute a flawless brand integration on photos, follow this sequence:
- Upload the Original Master Photo: Load your full-size studio or outdoor photo into the workspace canvas.
- Import Graphic Overlay: Toggle to the "Image/Logo" tab and select your transparent PNG brand mark.
- Scale Proportions: Resize your mark using proportional scaling so it complements the subject without dominating the frame.
- Determine Strategic Placement: Move the graphic into a designated corner or integrate it subtly into secondary subjects.
- Calibrate Alpha Transparency: Lower the opacity to blend the logo naturally with background lighting conditions.
- Export Ready Graphics: Download high-fidelity visual assets tailored for distribution.
Primary Use Cases for Logo Watermarking
Protect commercial landscape, portrait, and event captures before presenting web previews to prospective clients.
Discover how to watermark product images online for platforms like Etsy, Amazon, and Shopify to prevent competitors from taking your photos.
Protect high-end architectural photography, virtual staging renderings, and property walk-through stills.
Add Text Watermark to a Photo
When you lack a dedicated vector logo file, using a simple text watermark is a fast and effective alternative. Our web tool serves as a robust watermark maker that gives you full control over text typography, drop shadows, outlines, and rotation angles.
Standard Text Watermark Formats:
- Copyright Statements:
© 2026 Your Name All Rights Reserved(Quickly applied via our Copyright preset). - Brand Identification:
Your Brand Name(Simple, clear text overlays). - Direct Web Attribution:
YourWebsite.com(Drives referral traffic if images are shared elsewhere). - Document Asset Status:
DRAFTorCONFIDENTIAL(Angles diagonally across documents using our built-in controls).
If you want to add text watermark to image online free high resolution, our customizable controls ensure your text stays sharp and easy to read across both dark and light photo areas. Adding text elements like your website domain or social media handle creates a direct link back to your channel, helping turn re-shared content into website traffic.
Why Add a Watermark to Your Images?
In an age dominated by automated scrapers, social media bots, and content scraping, un-watermarked high-value photography can be re-hosted across the web within seconds. Applying a clear watermark offers several key business benefits:
1. Protect Creative Intellectual Property
A visible watermark establishes ownership right away. It serves as a clear notice that discourages unauthorized commercial reuse, re-selling, or unauthorized distribution.
2. Expand Brand Reach & Recognition
When your graphics, infographics, or photos get re-posted on Pinterest, Instagram, or blogs, a visible brand mark ensures your business gets credit wherever the image goes.
3. Secure Commercial Product Media
Online sellers investing in custom product photography can protect their assets from being scraped by competing vendors listing identical items.
4. Drive Direct Inbound Traffic
Watermarking images with a clean domain URL provides a direct visual reference point, helping interested viewers find your official site.
Best Watermark Placement for Photos
Finding the ideal watermark location requires balancing strong protection with a great viewer experience. Where you place your mark depends on how the photo will be used:
Bottom-Right Corner
The standard choice for modern photography, editorial images, and fine art portfolios. It provides subtle branding while keeping the main subject free of distractions.
Bottom-Left Corner
Ideal when the bottom-right frame contains important main elements or critical focus points.
Centered Placement
Placing a semi-transparent mark directly over the central focal area makes it virtually impossible for unauthorized users to crop out. This works well for proofing galleries and stock photography previews.
Full Image Diagonal Overlay
Rotating text at a -30° or -45° angle across the main subject provides maximum security for confidential documents, draft designs, or pre-release assets.
How to Choose the Right Watermark Opacity
Managing the opacity slider correctly is the key to creating a clean, professional watermark. Opacity dictates the balance between image visibility and protection:
| Opacity Level | Visual Impact | Recommended Application |
|---|---|---|
| Low (10% – 25%) | Subtle, unobtrusive mark | Fine art portfolios, wedding photography proofs, and personal blogs. |
| Medium (30% – 55%) | Clearly visible without taking over | E-commerce product displays, real estate listings, and branded social media posts. |
| High (60% – 100%) | Bold and immediately obvious | Client proofing galleries, internal draft documents, and high-security file sharing. |
Watermark JPG, PNG, and WebP Images Online
Different web photo formats require specific handling to maintain original visual quality. Our online platform handles a wide range of common image formats seamlessly:
Add Watermark to JPG Photos
JPEG is the standard format used by digital cameras, smartphones, and web photo galleries. When processing JPG files, our platform renders your overlays smoothly without applying harsh secondary compression, keeping your gradients and details crisp.
Add Watermark to PNG Image Online
PNG formats are ideal for graphics containing sharp edges, solid color blocks, or existing transparent backgrounds. Using our tool to add watermark to PNG image online preserves full alpha transparency support without flattening or damaging your background layers.
Add Watermark to WebP Assets
WebP is the modern image format built for fast web performance. Our system processes modern WebP images natively, allowing you to brand high-performance web graphics while keeping their lightweight size advantage intact.
Who Can Use an Online Image Watermark Tool?
Our online workspace caters to a wide variety of digital creators, business operators, and content teams:
Professional Photographers
Safeguard high-resolution client previews and portrait galleries prior to final delivery.
E-Commerce Stores
Learn watermark product photos without losing quality to prevent competitors from lifting custom product catalog images.
Social Media Managers
Quickly brand graphics, meme formats, and promo posts before sharing across platforms.
Bloggers & Content Writers
Protect custom visual guides, infographics, and original post photos.
Real Estate Agents
Add agency branding to home tour photos, floor plans, and property listings.
Mobile Creators
Learn how to watermark photos on phone browsers without downloading heavy software apps.
Online Watermark Tool vs. Photoshop
If you're searching for terms like "watermark image without Photoshop," complex photo editors can feel like overkill for quick watermarking tasks. Here is how our lightweight online utility compares to traditional desktop software:
| Feature Requirement | ImageToolsZone Online Utility | Adobe Photoshop / Desktop Suites |
|---|---|---|
| Installation & Setup | None required (Runs immediately in browser) | Heavy desktop installation required |
| Learning Curve | Instant (Simple slider controls) | Steep learning curve |
| Speed for Simple Tasks | Fast (Ready in seconds) | Requires launching app, setting up layers & settings |
| System Requirements | Works on any device (PC, Mac, Mobile) | Requires powerful computer hardware |
| Batch Processing | Supported directly in browser | Requires setting up complex actions/scripts |

How to Make a Professional Watermark
An improperly designed watermark can make even great photos look unappealing. Follow these core design principles to create a polished, professional presentation:
- Keep It Simple and Recognizable: Stick to your core brand name, clean logo icon, or main website domain. Avoid cluttered taglines or micro-text.
- Never Block Primary Subjects: Position your overlay so it frames the image without obscuring key elements like faces, focal points, or main products.
- Maintain Consistent Brand Styling: Use identical fonts, colors, and positioning across all images in a series for a clean, uniform look.
- Use High-Resolution Vector Logos: Always upload sharp, transparent PNG files for your logos. Low-resolution graphics will look blurry and unprofessional.
- Balance Contrast and Shadows: Use text outlines or soft drop shadows so your text stays readable against mixed dark and light backgrounds.
Common Watermarking Mistakes to Avoid
To keep your branded media looking crisp and professional, avoid these common mistakes:
Making your watermark excessively large distracts from the photo itself. Keep proportions balanced.
Solid, fully opaque logos look like harsh block stamps. Dial back opacity to blend elements naturally.
Overlaying a blurry JPEG logo ruins the appearance of an otherwise sharp photo.
Randomly shifting watermark locations within a single photo collection looks disorganized. Keep placement uniform.
Explore Related Free Image Processing Tools
Enhance your visual content creation workflow with our full suite of fast, browser-based photo editing utilities:
Frequently Asked Questions
Can I add a watermark to an image without losing quality?
Yes, absolutely. Watermarking itself does not require lowering image dimensions or introducing compression artifacts. By processing images locally through client-side canvas acceleration, our tool applies your text or logo directly onto the original high-resolution master file, allowing you to export high-quality images without pixel loss.
How do I add a watermark to a photo online?
The process takes just a few quick steps:
- Upload your photo into our online editor.
- Select either a Text or Image/Logo watermark type.
- Type your text or select a transparent PNG logo file.
- Adjust scale, rotation, and opacity sliders.
- Click the Download button to export your finished photo.
Can I add my logo as a watermark?
Yes. Simply click on the "Image/Logo" tab within the settings panel, select a graphic file from your device (preferably a transparent PNG or vector export), and customize its size, placement, and transparency.
Can I add a text watermark to a JPG image?
Yes. You can overlay custom text, choose fonts, select colors, add outlines, adjust opacity levels, and apply text styles directly over any standard JPG image file.
Can I watermark a PNG image while preserving its transparency?
Yes. Our editor supports transparent PNG graphics natively. It adds your watermark without flattening background elements or adding unexpected white borders to transparent regions.
What is the best opacity setting for a watermark?
There is no single opacity setting that works for every situation. For subtle branding that doesn't distract from your subject, use 15% to 30% opacity. For e-commerce product listings or social media content, 35% to 50% opacity offers a good balance of protection and readability. For security drafts or proof galleries, 60% to 80% opacity provides stronger protection.
Where should I place my watermark on a photo?
The bottom-right corner is the most popular spot for clean, unobtrusive branding. However, if you want maximum protection against unauthorized cropping, place your watermark near the center or angle it diagonally across the main subject.
Does a watermark completely protect my image from being stolen?
While a watermark clearly shows ownership and discourages unauthorized commercial use, no visual marker can guarantee absolute protection. However, applying a visible brand mark or copyright symbol remains one of the most effective ways to establish ownership and maintain visual attribution.
Can I add a website URL as a watermark?
Yes. Adding your domain name (e.g., YourWebsite.com) as a text watermark is a great way to drive traffic back to your site when photos are re-shared across social media networks.
Can I watermark images on my phone without installing an app?
Yes! Our tool is fully responsive and mobile-friendly. You can access it directly through iOS Safari, Google Chrome, or any mobile browser to watermark photos instantly without installing extra mobile apps.
Ready to Protect & Brand Your Media?
Start applying clean text and logo watermarks directly in your browser without sacrificing visual quality.
Watermark Your Images Now