Export your image
Overlay Images Online Free — Add One Image on Another in Seconds
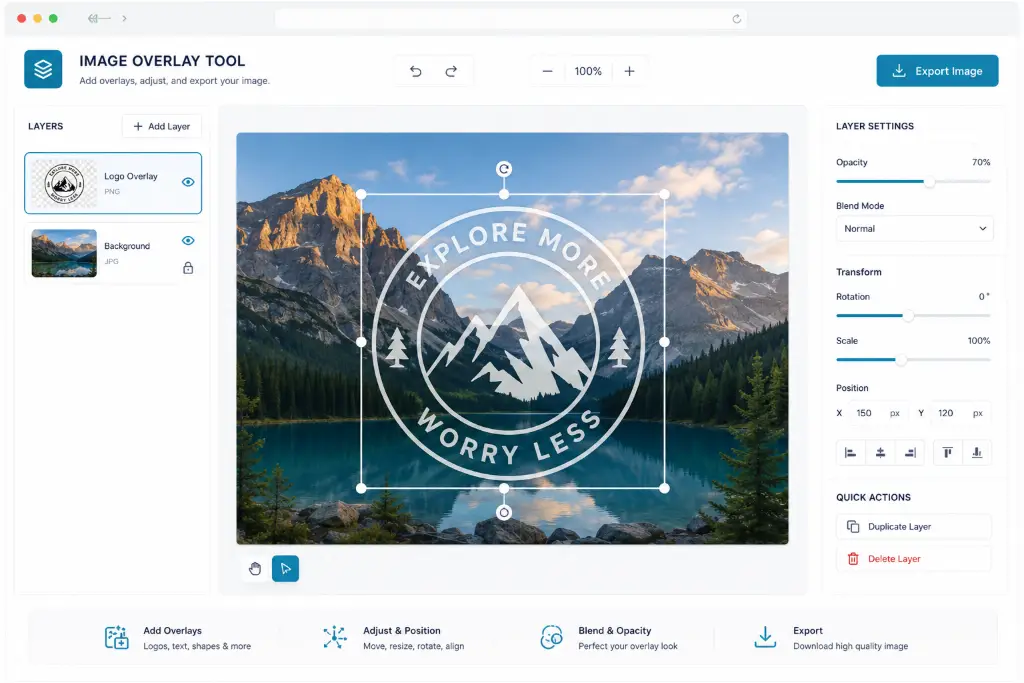
Drop a background photo in, drag a logo, sticker or second photo on top, nudge the opacity until it looks right, and download. That's the whole idea behind the Image Overlay Tool above — no design degree, no software install, no watermark on your download.
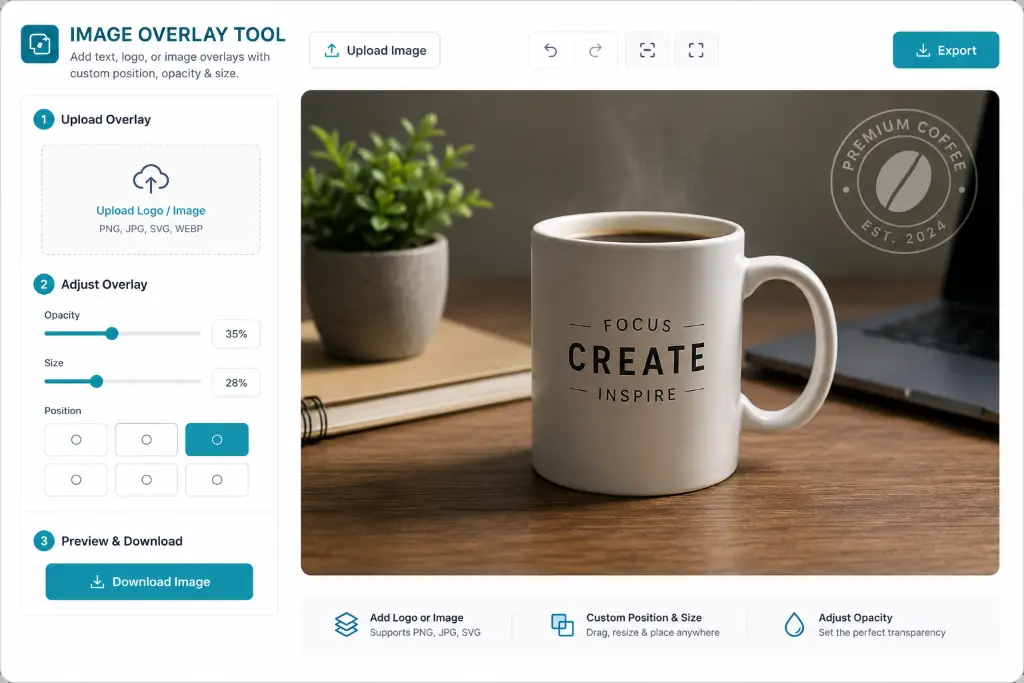
What is an image overlay tool?
In plain terms, it's a way to place one picture on top of another and control how the two blend together — size, position, transparency, rotation, all of it — before you flatten them into a single, downloadable image.
Think about the last time you needed a logo stamped on a product photo, a badge added to a thumbnail, or two photos merged into one collage-style shot. You probably reached for a heavy photo editor, got lost in menus, or gave up and used a phone app that slapped a watermark on the result. An overlay tool skips all of that. You upload a background, add whatever you want on top — a photo, a logo, text, a shape — and adjust it visually until it looks right.
The difference between this and a basic "merge two photos" tool is control. A real overlay editor gives you layers, so you can stack several images, reorder them, resize each one independently, and fine-tune exactly how the top layer interacts with the one underneath using opacity and blend modes — the same concept Photoshop and Illustrator use, just without the learning curve. If you're used to simpler edits like a straightforward free image cropper or a quick image compressor, an overlay tool is the natural next step once you need two images working together instead of one.
It also helps to know what it's not. An overlay tool isn't a full illustration suite, and it isn't trying to be. You're not painting brush strokes or building vector paths from scratch — you're composing existing images and simple shapes on a canvas, the same way you'd arrange cutouts on a table before gluing them down. That narrower focus is exactly what keeps it fast: open a tab, drop in two photos, and you're editing within seconds instead of waiting on a heavy application to load.
The "overlay" itself can be almost anything. A logo. A second photograph. A sticker. A hand-drawn badge. A translucent texture used to add grain or light leaks to a photo. A screenshot dropped over a device mockup. Because every overlay behaves as its own layer, you can mix all of these in one composition — a background photo, a product cutout, a text caption and a small shape, all stacked, all independently adjustable, all combined into one flat image the moment you hit download.
What the tool actually does
Every control on the left and right panel of the editor maps to one of these jobs.
Layers you into position
Upload a background and stack as many overlay images, text boxes and shapes on top as you need, each as its own independent layer.
Resizes and rotates precisely
Drag the corner handles, hold Shift to keep proportions, or type exact pixel values and rotation degrees for pixel-perfect placement.
Blends the layers together
Opacity sliders and 16 blend modes (Multiply, Screen, Overlay and more) control how your overlay reacts with what's underneath it.
Applies real-time effects
Brightness, contrast, saturation, blur, grayscale and sepia adjust live on each overlay without ever touching the original file.
Adds text and shapes
Captions, watermarks, badges and simple shapes behave exactly like image layers — move, resize, rotate and style them the same way.
Exports at full quality
Flatten everything into one PNG, JPG or WebP file — original size or scaled up — with a clean filename and no watermark.
Who this tool is built for
Online sellers
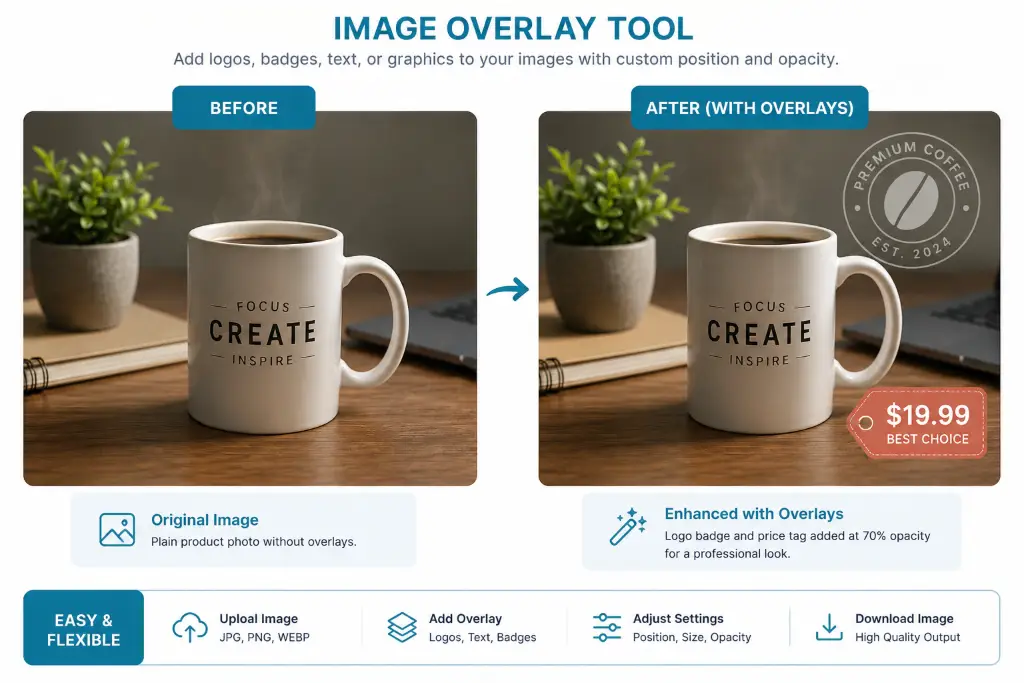
Stamp a logo, price tag or "new arrival" badge onto product photos without opening a design app.
Content creators
Layer a face-cam cutout or a reaction sticker over a screenshot for a YouTube thumbnail that actually gets clicked.
Social media managers
Build on-brand templates at exact Instagram, Story or Pinterest sizes, then swap the photo underneath each week.
Small design teams
Mock up how a sticker, watermark or badge will look on real photos before sending it off for approval.
Key features, at a glance
Unlimited overlay layers
Stack as many images, text boxes and shapes as your composition needs.
Opacity & 16 blend modes
From subtle Soft Light to bold Multiply, matched in real time.
Smart guides & snapping
Overlays snap to the canvas center, edges and other layers automatically.
Crop before you place
Freeform or fixed ratios like 1:1, 4:5, 16:9 and Story 9:16.
Full undo/redo history
Up to 50 steps back, so nothing you try is ever a risk.
Flip, rotate, align
One-click horizontal/vertical flip and a full alignment grid.
Custom canvas sizes
Instagram, YouTube, Pinterest and Facebook presets, or type your own.
Keyboard shortcuts
Undo, duplicate, nudge and delete without reaching for the mouse.
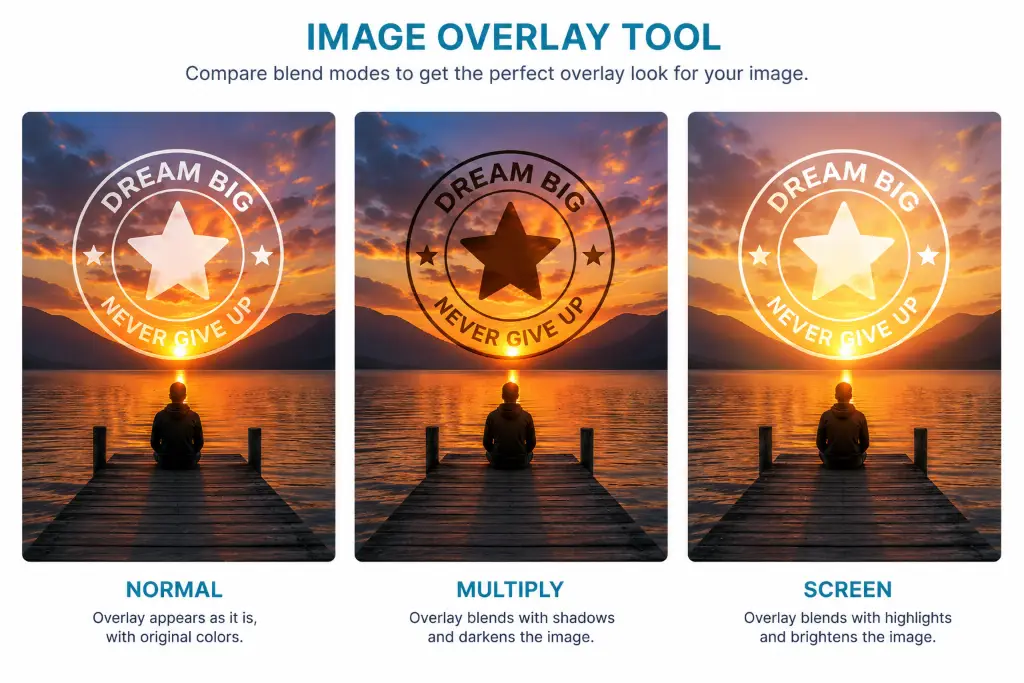
Opacity vs. blend mode — what's the actual difference?
These two controls get confused a lot, so it's worth separating them clearly.
Opacity = see-through
Dial opacity down and the whole layer simply fades, like holding tracing paper over a photo. It doesn't change colors, only how much of the layer beneath shows through.
Blend mode = math
A blend mode is a formula that mixes the top layer's colors with the layer underneath. Multiply darkens, Screen lightens, Overlay boosts contrast — same overlay image, very different results.
Together they're flexible
Pair a subtle blend mode with a partial opacity and you can make a logo look printed onto fabric, or a texture look baked into a photo rather than stuck on top of it.
A good habit: place your overlay, try Normal at 100% first so you can see it clearly, then click through Multiply, Screen and Soft Light while watching the canvas update live. It only takes a few seconds to spot the one that actually fits the photo underneath. If the overlay itself needs cleanup before any of that — stray background, uneven edges, a odd color cast — the background remover and black and white converter are both worth running first.
Supported image formats
Upload and export across the formats people actually use day to day.
JPG / JPEG
Upload & export
PNG
Upload & export, keeps transparency
WebP
Upload & export
GIF
Upload (first frame)
AVIF uploads are supported where your browser allows it. Need to convert between formats without losing quality first? The format converter handles that separately, and if a photo needs shrinking before you upload it here, run it through the image compressor first.
How to overlay one image on another
Six steps, no manual required.
Upload background
Drag your base photo in, or click to browse.
Add overlay
Click "Add Overlay Image" and pick a second photo or logo.
Position it
Drag, resize and rotate until it sits where you want.
Adjust the blend
Set opacity, blend mode and any effects.
Add text or shapes
Optional — captions, badges, arrows.
Download
Choose PNG, JPG or WebP and save.
If your overlay needs an unusual outline rather than a plain rectangle, crop it first — a circle crop works well for profile-style badges, an oval crop softens a photo edge, and the custom shape crop tool covers anything more specific. Selling products online? Running the item through the auto crop for e-commerce tool first, or stripping the background with the background remover, makes the overlay sit far more naturally once it's layered on top of a scene.
Privacy & security
Processed locally
Your images are drawn and combined directly in your browser's canvas. There's no server-side processing step your files need to pass through to produce the final export.
Nothing kept around
Close or refresh the tab and the working files are gone — nothing is quietly uploaded or stored for later.
Real use cases
Product photography
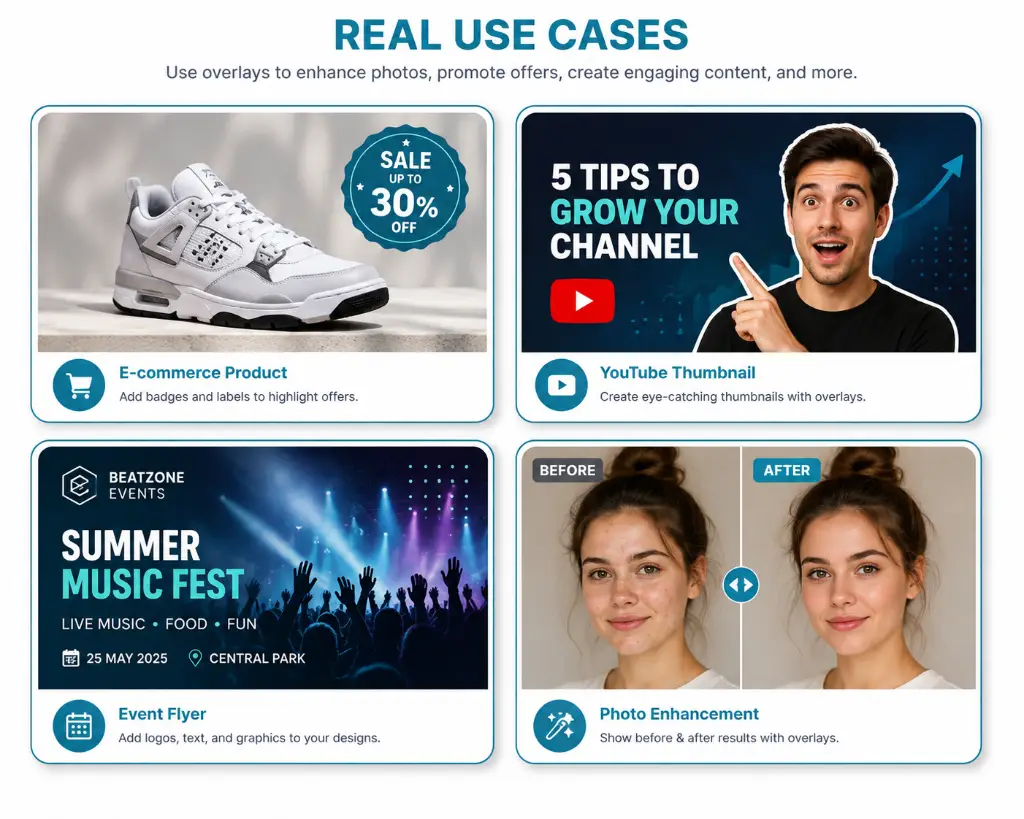
Add a "Sale" badge or logo to a batch of listing photos in a fraction of the time a full editor takes.
YouTube thumbnails
Cut yourself out of a photo, drop it over a screenshot, and set the canvas straight to 1280×720.
Event flyers
Layer a venue photo, an event logo and a text headline, then export at print-friendly resolution.
Before/after comparisons
Overlay a "before" photo at 50% opacity on a "after" shot to show a transformation at a glance.
Watermarking a portfolio
Stamp a subtle signature or studio name across a set of photos before sharing proofs with a client.
Social media templates
Build a reusable layout once, then swap in a new photo and headline each time you post.
Once the composition is done, a few finishing touches usually help: round off sharp corners with the rounded corner tool, resize the final export to an exact pixel size with the resize tool, or run a light pass through the image enhancer if the source photo looked a little flat. And if the goal was a shaped badge rather than a rectangle, the star shape crop and heart shape crop tools are quick ways to get there before you bring the image into the overlay editor.
Troubleshooting
My overlay won't move
Check the lock icon in the Layers panel — a locked layer stays put on purpose until you unlock it.
Blend mode looks flat
Blend modes react to the colors underneath, so a plain white or black background can make a mode like Multiply or Screen look like it's "doing nothing."
Image loaded sideways
Some phone photos carry rotation metadata. Use the rotate handle or the flip buttons to straighten it out manually.
Export looks blurry
If you scaled a small overlay up a lot, the source image runs out of detail. Start from a higher-resolution original where possible.
URL import failed
Some sites block cross-site image loading. Save the image to your device and use the Device upload option instead.
Cloud save didn't upload
Direct Google Drive, Dropbox and OneDrive uploads need that provider's own connection set up — until then, the tool saves to your device so you can upload it yourself.