Change Image DPI Online Free: How to Set Images to 300 DPI
"My image needs to be 300 DPI." "The website says my photo must be 300 DPI." "How can I change 72 DPI to 300 DPI?" If these sound familiar, you're in the right place. Learn how to change image DPI online without losing quality.
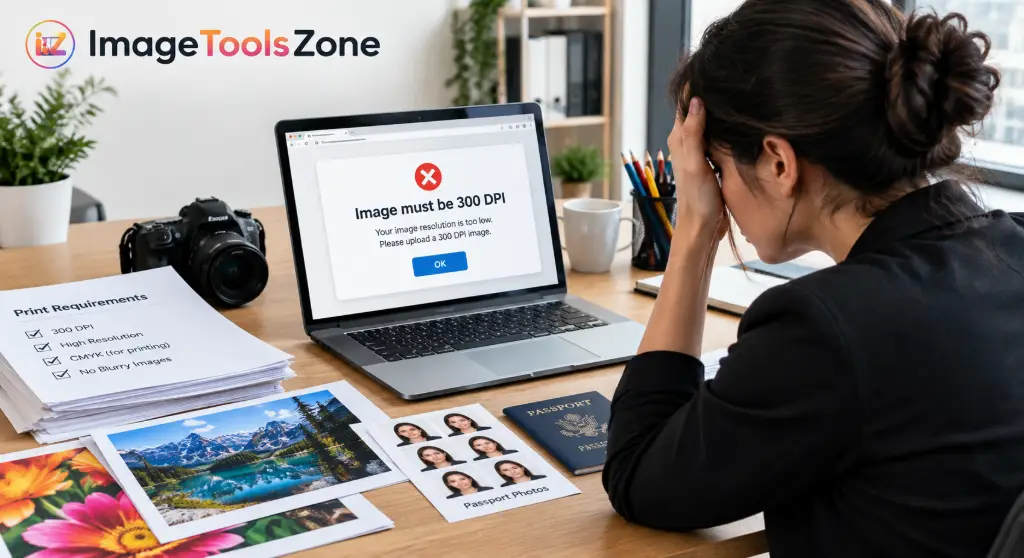
Have you ever been stuck trying to upload a photo for a passport application, only to get rejected because "image must be 300 DPI"? Or maybe your print shop keeps telling you your photos need to be "300 DPI minimum" and you have no idea what that means or how to fix it?
You're not alone. Thousands of people search for ways to change image DPI online every single day. Whether you're preparing photos for printing, submitting documents for visa applications, or creating professional artwork, understanding DPI and knowing how to adjust it is crucial.
The good news? You don't need expensive software like Photoshop or complicated technical knowledge. In this guide, we'll walk you through everything you need to know about changing image DPI online for free, with simple step-by-step instructions that actually work.
What Is Image DPI?
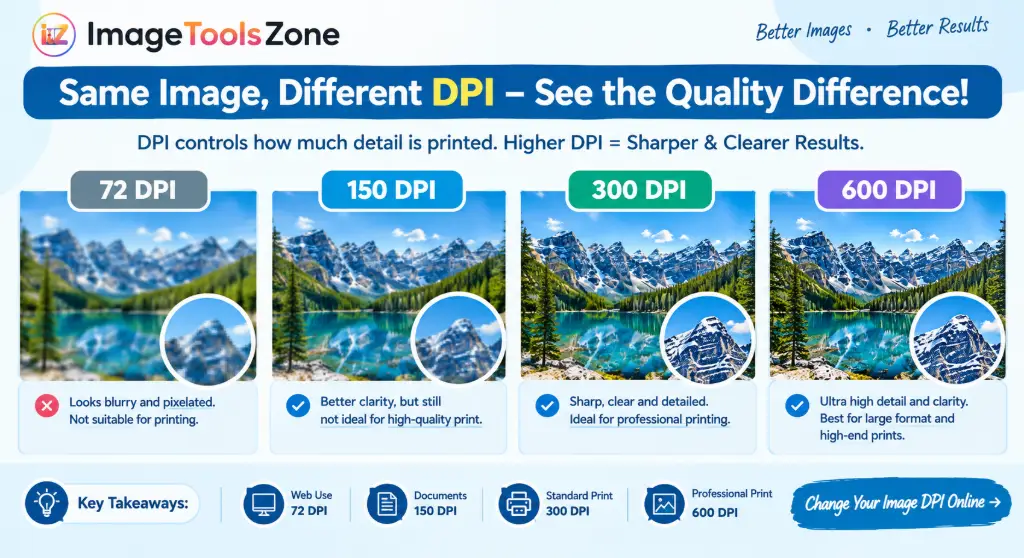
Let's start with the basics. DPI stands for "Dots Per Inch" — it's a measurement that tells printers how many individual dots of ink they should place in one inch when printing your image. Think of it as instructions for the printer on how densely to pack the ink.
Why Does DPI Matter?
When you print an image, the DPI setting determines how large or small that image will appear on paper. Here's the key difference most people miss:
- Pixel dimensions = The actual size of your image in pixels (like 3000 × 2000 pixels)
- DPI = Instructions telling the printer how to interpret those pixels
For example, if you have an image that's 3000 pixels wide:
- At 300 DPI, it will print at 10 inches wide (3000 ÷ 300 = 10)
- At 150 DPI, it will print at 20 inches wide (3000 ÷ 150 = 20)
- At 72 DPI, it will print at 41.67 inches wide (3000 72 = 41.67)
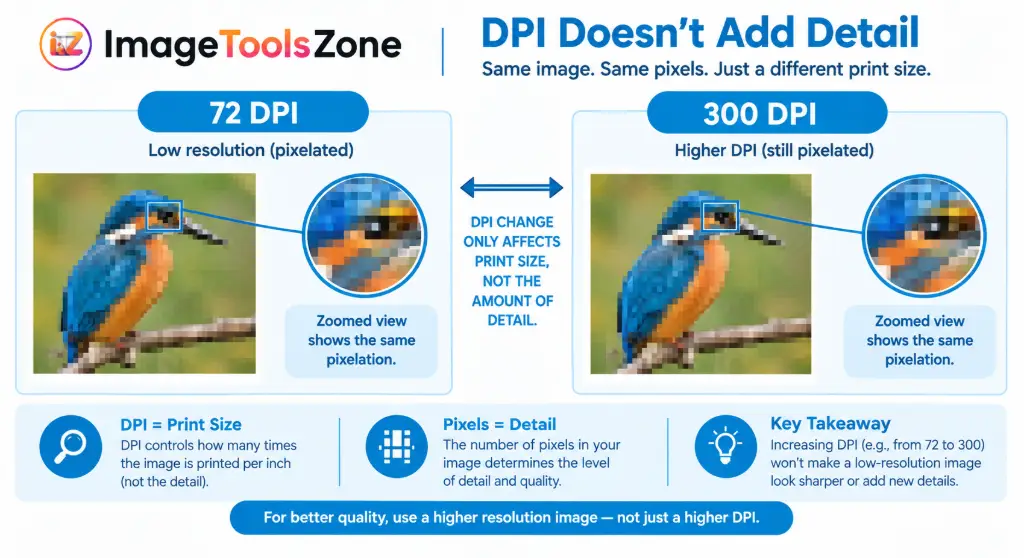
The image hasn't changed — it's still 3000 pixels wide. But the print size changes based on the DPI setting.
How to Change Image DPI Online
Ready to actually change your image DPI? Here's the simplest method using a free online tool. No software download required, no watermarks, and it works on any device.
Open the Image DPI Changer
Visit ImageToolsZone Image DPI Changer in your web browser. The tool loads instantly — no registration or signup needed.
Upload Your Image
Click the upload button and select your JPG or PNG file. You can also drag and drop your image directly onto the upload area. The tool supports most common image formats.
Set Your Desired DPI
Enter your target DPI value. For most printing needs, you'll want to select 300 DPI. The tool also offers preset options for 72, 150, 300, and 600 DPI.
Download Your Updated Image
Click the download button to get your image with the new DPI setting. The process takes just seconds, and your image quality remains exactly the same.
Ready to Change Your Image DPI?
Use our free online tool to set your images to 300 DPI in seconds. No Photoshop required, no watermarks, completely free.
Change Image DPI Online Now →That's it! Four simple steps and you're done. The Image DPI Changer processes everything right in your browser, which means your images never leave your computer — perfect for sensitive documents or private photos.
🛠️ Related Tools You Might Need:
- Resize Image to Exact Size - Adjust pixel dimensions before changing DPI
- Image Compressor - Reduce file size after DPI conversion
- Convert Image Format - Switch between JPG, PNG, and other formats
- View Image Metadata - Check current DPI and other image info
- Background Remover - Clean up images before printing
- Image Enhancer - Improve quality before DPI adjustment
- Professional Image Editor - Advanced editing capabilities
How to Change an Image to 300 DPI Online
300 DPI is the gold standard for professional printing. Whether you're printing photos, creating marketing materials, or submitting documents, 300 DPI ensures crisp, clear results. Let's break down exactly how to change image to 300 DPI online for different scenarios.
Why 300 DPI?
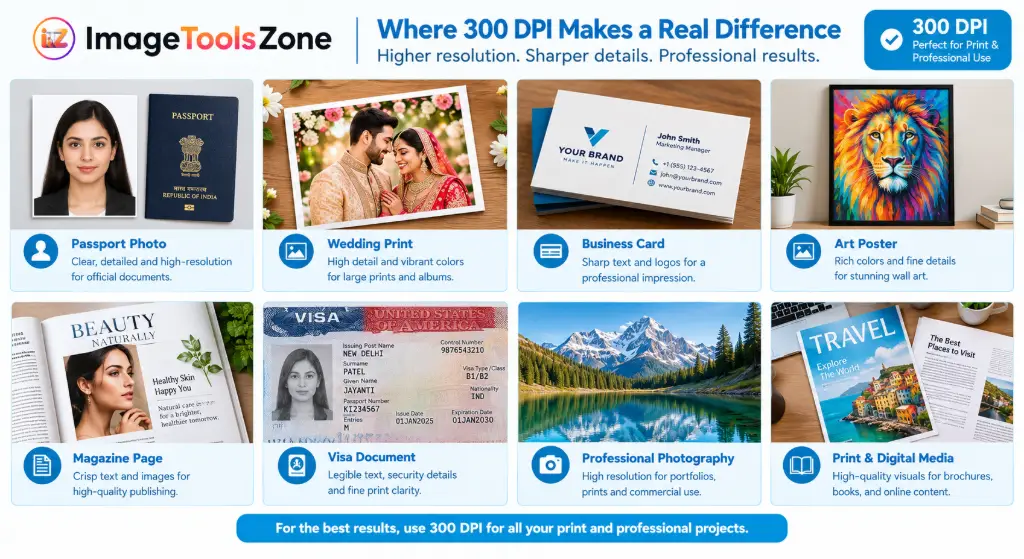
Most professional print shops, government agencies, and photography services require 300 DPI because it provides:
Sharp Details
300 dots per inch creates smooth gradients and fine details that look professional
Higher DPI ensures colors blend smoothly without visible pixelation
Universal Standard
Accepted by virtually all print shops and professional services worldwide
Common 300 DPI Conversion Scenarios
Changing 72 DPI to 300 DPI
Most images from the internet, social media, or digital cameras are set to 72 DPI (optimized for screens). To change 72 DPI to 300 DPI:
- Upload your 72 DPI image to the Image DPI Changer
- Select 300 DPI as your target
- Download the converted file
Note: Remember, this changes the metadata only. If your image is too small in pixels, you may also need to resize it first.
Changing 150 DPI to 300 DPI
Some documents or older scans come in at 150 DPI. The process is identical — just upload and select 300 DPI as your target value.
Changing 600 DPI to 300 DPI
Sometimes you need to reduce DPI (like when a file is too large). Simply upload your 600 DPI image and select 300 DPI instead.
JPG to 300 DPI
JPG files are the most common format for photos. The DPI changer handles JPG files perfectly, preserving all your image quality while updating the DPI metadata.
PNG to 300 DPI
PNG files often contain transparent backgrounds or graphics. You can change PNG to 300 DPI using the same simple process — the transparency and quality remain intact.
72 DPI vs 150 DPI vs 300 DPI vs 600 DPI
Understanding the differences between common DPI settings helps you choose the right one for your project. Here's a comprehensive comparison:
| DPI Setting | Common Use Cases | Print Quality | File Size |
|---|---|---|---|
| 72 DPI | Web images, screen displays, email attachments, social media | Low (pixelated when printed) | Smallest |
| 96 DPI | Windows displays, some document workflows | Low-Medium | Small |
| 150 DPI | Large format prints, posters viewed from distance, internal documents | Medium (acceptable for large prints) | Medium |
| 300 DPI | Professional photos, magazines, brochures, passport photos, art prints | High (industry standard) | Large |
| 600 DPI | Fine art reproduction, detailed technical drawings, archival printing | Very High (specialized use) | Largest |
Screen Only
Large Prints
Professional
Fine Art
When to Use Each DPI Setting
72 DPI - Digital Only
Use 72 DPI when your image will only be viewed on screens — websites, presentations, social media, or email. This keeps file sizes small for faster loading.
150 DPI - Budget Printing
Good for large posters, banners, or documents where people won't examine details closely. Saves storage space while maintaining acceptable quality.
300 DPI - Professional Standard
This is your go-to for:
- Photography prints
- Marketing materials (flyers, brochures)
- Passport and visa photos
- Artwork and portfolios
- Magazine submissions
- Professional documents
600 DPI - Specialized Work
Reserve 600 DPI for fine art reproduction, detailed technical illustrations, or when you need maximum quality for archival purposes. Creates very large files.
Does Changing DPI Increase Image Quality?
The Truth About DPI and Quality
Let's be crystal clear about what happens when you change image DPI:
What DPI Change DOES
Updates metadata telling printers how to interpret existing pixels. Changes the print size without altering pixel count.
What DPI Change DOESN'T
Add new pixels, create detail, fix blur, enhance quality, or upscale resolution. It's metadata only.
Real Example
Imagine you have a photo that's 1200 × 800 pixels:
At 72 DPI:
Print size = 800 ÷ 72 = 11.11 inches tall
At 300 DPI (after changing):
Print size = 800 ÷ 300 = 2.67 inches tall
Pixel count: Still 1200 × 800 (unchanged)
The image quality is identical in both cases — same pixels, same detail. The only difference is how large it will print.
What If I Need More Quality?
If your image is too small in pixels for your desired print size at 300 DPI, you need to:
- Resize/Upscale the image first using an image enhancer or AI upscaling tool
- Then change the DPI to 300
For example, to print an 8×10 inch photo at 300 DPI, you need at least 2400 × 3000 pixels. If your image is only 1200 × 800 pixels, changing DPI won't help — you need more pixels first.
What DPI Should I Use for Printing?
Choosing the right DPI depends on what you're printing and how close people will view it. Here's your complete guide:
Professional Work
& Banners
& Archival
DPI Recommendations by Project Type
Photographs (300 DPI)
Family photos, portraits, wedding pictures, product photography — always use 300 DPI for the best quality.
Documents & Reports (150-300 DPI)
Business documents, reports, and presentations typically look great at 150-300 DPI. Use 300 if they contain photos or detailed graphics.
Posters & Banners (150 DPI)
Large format prints viewed from a distance don't need 300 DPI. 150 DPI is usually sufficient and keeps file sizes manageable.
Passport & ID Photos (300 DPI)
Government applications almost always require 300 DPI. Check specific requirements, but 300 DPI is the safe standard.
Artwork & Portfolios (300-600 DPI)
Fine art prints benefit from 300 DPI minimum. For museum-quality or archival work, consider 600 DPI.
Magazines & Publications (300 DPI)
Professional publishing standards require 300 DPI for all images and graphics.
Flyers & Brochures (300 DPI)
Marketing materials need to look professional — 300 DPI ensures crisp text and vibrant images.
So for an 8×10 print at 300 DPI, you need: 8×300 = 2400 pixels wide, 10×300 = 3000 pixels tall
How to Calculate Image Print Size
Understanding the relationship between pixels, DPI, and print size helps you avoid disappointment. Let's work through some real examples:
Example 1: Standard Photo
Image: 3000 × 2000 pixels
At 300 DPI:
Height: 2000 ÷ 300 = 6.67 inches
Print size: 10" × 6.67"
At 150 DPI:
Height: 2000 150 = 13.33 inches
Print size: 20" × 13.33"
Same pixels, different print sizes!
Example 2: Passport Photo Requirements
Required: 2" × 2" at 300 DPI
Height needed: 2" × 300 = 600 pixels
Minimum: 600 × 600 pixels
Example 3: 8×10 Professional Print
Desired: 8" × 10" at 300 DPI
Height needed: 10" × 300 = 3000 pixels
Minimum: 2400 × 3000 pixels
If your image doesn't have enough pixels, you'll need to resize it larger before setting the DPI to 300.
How to Change Image DPI Without Losing Quality
This is one of the most searched phrases related to DPI, and for good reason. Nobody wants to ruin their precious photos. Here's what you need to know about changing DPI without losing quality.
The Good News
When you use a proper Image DPI Changer that only modifies metadata (not resampling the image), you lose zero quality. The pixel data remains 100% intact — you're just changing a number in the file's information.
What "Losing Quality" Actually Means
Quality loss happens when you:
- Resample/Resize the image (adding or removing pixels)
- Compress the file (reducing JPG quality)
- Convert between formats poorly
Simply changing the DPI metadata does NONE of these things.
❌ Risky Process: Upload → Resize/Resample → Change DPI → Compress → Download = Possible quality loss
Best Practices for Quality Preservation
- Work with originals: Always start with your highest quality source file
- Use PNG for editing: If possible, work with PNG files which use lossless compression
- Avoid multiple conversions: Change DPI once, not repeatedly
- Check before printing: Use metadata viewer to verify settings
- Keep backups: Save your original before any changes
When You Actually Need to Resize
Sometimes you do need to change pixel dimensions along with DPI. For example:
Scenario: Your image is 1200 × 800 pixels at 72 DPI
Current print size: 16.67" × 11.11"
You want: 4" × 2.67" at 300 DPI
Result: 4" × 2.67" (same pixels, smaller print) ✓
Option 2: Resize to 2400 × 1600, then set 300 DPI
Result: 8" × 5.33" at 300 DPI (larger print, same quality)
Requires image enhancement to maintain quality
How to Change JPG and PNG DPI Online
Different file formats handle DPI slightly differently. Here's what you need to know for the two most common formats.
How to Change JPG DPI Online
JPG (or JPEG) is the universal format for photographs. Here's how to change JPG DPI online:
- Open the Image DPI Changer
- Upload your JPG file
- Select your target DPI (usually 300)
- Download — your JPG now has the new DPI setting
JPG-specific tips:
- JPG uses lossy compression, so avoid saving multiple times
- DPI change doesn't affect JPG compression quality
- Perfect for photos, certificates, and documents
How to Change PNG DPI Online
PNG files are great for graphics, logos, and images with transparency. To change PNG to 300 DPI:
- Upload your PNG to the DPI changer tool
- Set your desired DPI value
- Download — transparency and quality preserved
PNG-specific tips:
- PNG uses lossless compression — perfect for repeated editing
- Transparency is maintained when changing DPI
- Ideal for graphics, logos, and images needing transparency
- Larger file sizes than JPG, but better quality
Use JPG For
Photographs, web images, email attachments, general printing where small file size matters
Use PNG For
Logos, graphics with text, transparent backgrounds, images requiring multiple edits
Both formats work perfectly with our free DPI changer. Choose based on your needs — the DPI changing process is identical for both.
Can I Change Image DPI on a Phone?
Absolutely! One of the best things about online DPI changers is that they work on any device with a web browser. Here's how to change image DPI on mobile:
Safari/Chrome
Any Browser
iPad/Android
Windows/Mac
Mobile DPI Changing Steps
- Open your phone's browser (Chrome, Safari, Firefox, etc.)
- Navigate to ImageToolsZone DPI Changer
- Tap "Upload" and select from your photo library
- Choose 300 DPI (or your desired setting)
- Tap download — the file saves to your phone
✓ No app download required
✓ Works offline after page loads
✓ Photos stay on your device
✓ Quick and convenient
✓ Free to use
Whether you're on Android, iPhone, iPad, or any tablet, the process is identical. The tool is fully responsive and optimized for touch screens.
Your Privacy and Security
When dealing with personal photos, ID documents, or sensitive images, privacy matters. Here's how the Image DPI Changer protects your data:
Browser-Based Processing
Images are processed directly in your browser using JavaScript. Files don't upload to external servers.
No Storage
We don't save, store, or keep copies of your images. What happens in your browser stays in your browser.
Secure Connection
HTTPS encryption protects your connection. Your data is safe from interception.
This local processing approach is increasingly common among privacy-focused tools. Your images never leave your device, making it safe for:
- Passport and visa photos
- Government documents
- Personal family photos
- Confidential business materials
- ID cards and licenses
Change Image DPI Online Without Photoshop
Let's be honest — not everyone has Photoshop, and not everyone wants to pay $20/month for software just to change a DPI number. The good news? You don't need Photoshop to change image DPI.
Why Use an Online Tool Instead?
| Feature | Online DPI Changer | Photoshop |
|---|---|---|
| Cost | Free | $20-60/month |
| Learning Curve | 30 seconds | Hours/days |
| Installation | None | Large download |
| Device Requirements | Any browser | Powerful computer |
| Speed | Seconds | Minutes |
When Photoshop IS Better
To be fair, Photoshop (or similar software) makes sense when you need to:
- Perform complex editing beyond DPI changes
- Work with layers and advanced features
- Batch process hundreds of images
- Use professional color management
When Online Tools Win
For simple DPI changes, online tools are unbeatable:
- Quick one-off conversions
- Working from different computers
- Mobile or tablet use
- Budget-conscious users
- Non-designers who need occasional changes
Skip the Photoshop Subscription
Change your image DPI in seconds, not hours. No credit card, no download, no learning curve.
Try Free DPI Changer →Related searches this helps with: change DPI without Photoshop, change image resolution without Photoshop, easiest way to change image DPI, free DPI converter online
How to Check Image DPI Before Changing It
Before you change your image DPI, it helps to know what it currently is. Here's how to check image DPI and why it matters:
Why Check First?
- Confirm if you actually need to change it
- Understand your starting point
- Verify the change worked afterward
- Troubleshoot printing issues
Methods to Check DPI
Method 1: Online Metadata Viewer
Use our Image Metadata Viewer to see DPI along with other image information like dimensions, file size, color space, and more.
Method 2: Windows
- Right-click the image file
- Select "Properties"
- Click "Details" tab
- Look for "Horizontal resolution" and "Vertical resolution"
Method 3: Mac
- Right-click (or Control-click) the image
- Select "Get Info"
- Expand "More Info" section
- Find resolution information
Method 4: Photoshop/GIMP
- Open the image
- Go to Image → Image Size
- Check the Resolution field
1. Check current DPI → 2. Determine required DPI → 3. Change DPI using DPI Changer → 4. Verify the result
What Changing Image DPI Cannot Fix
Being clear about limitations prevents frustration. Here's what a simple DPI change cannot do:
Add Missing Pixels
If your image is 500×500 pixels, changing DPI won't make it 3000×3000. You need upscaling for that.
Fix Blurry Photos
Out-of-focus or motion-blurred images stay blurry. Try an image enhancer instead.
Increase Detail
DPI changes don't add photographic detail or sharpness to existing pixels.
Meet Size Requirements
If you need a 4×6 print but your image is only 600×400 pixels, changing DPI won't help. You need more pixels.
What You Actually Need
If DPI change isn't enough, here's what to do:
- Need more pixels? → Use image resizer or AI upscaling
- Image is blurry? → Try image enhancement tools
- File too large? → Use image compressor after DPI change
- Wrong format? → Use format converter
Why People Need to Change Image DPI
Understanding real-world use cases helps you see why DPI matters. Here are the most common reasons people search for change image DPI online:
Assignments
Visa Photos
Applications
Photography
Detailed Use Cases
Printing Photos
Family portraits, wedding photos, vacation pictures — all need 300 DPI for professional-quality prints that last.
Print Shops
Commercial printers require 300 DPI minimum. Submitting 72 DPI files results in poor quality or rejection.
School and College Assignments
Many educational institutions require 300 DPI for thesis documents, research posters, and project submissions.
Government Applications
Passport photos, visa applications, ID cards, and official documents typically specify 300 DPI requirements.
Resume Documents
Professional resumes with photos or graphics should use 300 DPI for crisp printing.
Publishing
Books, magazines, and journals require 300 DPI for all images and illustrations.
Etsy Printables
Sellers creating digital downloads for customers to print need 300 DPI files.
Photography Portfolios
Professional photographers must deliver 300 DPI files to clients for printing.
Artwork
Artists selling prints or submitting to galleries need 300-600 DPI depending on the medium.
Marketing Materials
Brochures, flyers, business cards, and banners all require proper DPI for professional results.
Complete Your Image Workflow
Changing DPI is often just one step in preparing images. Here are other tools that complement the DPI changer:
Resize and Adjust
- Resize Image to Exact Size - Set precise pixel dimensions
- Free Image Cropper - Remove unwanted areas
- Circle Crop Image - Create circular profile pictures
- Oval Shape Crop - Professional headshot format
🎨 Enhance and Edit
- Image Enhancer - Improve quality and sharpness
- Professional Image Editor - Advanced editing tools
- Advanced Photo Editor - No watermark editing
- Black and White Converter - Create monochrome images
📦 Optimize and Convert
- Image Compressor - Reduce file size
- Format Converter - Change between JPG, PNG, etc.
- Background Remover - Isolate subjects
- Image Overlay - Combine images
🎯 Special Effects
- Photo to Cartoon - Create artistic effects
- Image to Sketch - Pencil drawing effect
- Oil Painting Effect - Artistic transformation
- Glitch Effect - Modern digital art
Frequently Asked Questions About Changing Image DPI
To change image DPI online, use a free tool like the Image DPI Changer. Simply upload your image, select your desired DPI (like 300), and download the updated file. The entire process takes less than a minute and requires no software installation.
To change an image to 300 DPI, upload it to an online DPI changer, select 300 DPI as your target value, and download the result. This is the standard for professional printing. Make sure your image has enough pixels for your desired print size (multiply inches by 300 to get required pixels).
Yes, you can easily change JPG DPI online using free tools. JPG files are fully compatible with DPI changers. The process preserves your image quality while updating the DPI metadata. This is perfect for photos that need to meet printing requirements.
Absolutely! PNG files work perfectly with online DPI changers. The advantage of PNG is that it uses lossless compression, so you can change DPI multiple times without any quality degradation. Transparency is also preserved during the DPI change process.
Yes, you can change 72 DPI to 300 DPI easily. However, remember that this only changes the metadata — it doesn't add pixels. If your image is 720 pixels wide at 72 DPI (printing at 10 inches), changing to 300 DPI will make it print at 2.4 inches unless you also increase the pixel dimensions.
No, changing DPI alone does not reduce image quality. When you use a proper DPI changer that only modifies metadata (not resampling), your pixels remain 100% intact. Quality loss only occurs if you resize, compress, or convert the image format poorly.
No, changing DPI does not increase resolution. Resolution refers to pixel dimensions (like 1920×1080). DPI is just metadata telling printers how to interpret those pixels. To increase resolution, you need to add pixels through upscaling or resizing, not just change the DPI number.
300 DPI is the industry standard for high-quality printing. This applies to photos, documents, marketing materials, and professional work. For large format prints viewed from a distance (like banners), 150 DPI may be sufficient. For fine art or archival printing, consider 600 DPI.
Yes! You don't need Photoshop to change DPI. Free online tools like ImageToolsZone DPI Changer make it simple and fast. Online tools are perfect for quick changes without the cost or complexity of professional software.
Yes, you can change image DPI on your phone or tablet. Simply open your mobile browser, navigate to an online DPI changer, upload your image from your photo library, set the DPI, and download. It works on iPhone, Android, and any device with a web browser.
No, changing DPI does not change pixel dimensions. A 2000×1500 pixel image remains 2000×1500 pixels whether it's set to 72 DPI or 300 DPI. Only the print size changes. To change pixel dimensions, you need to resize the image separately.
Yes, you can change DPI without changing the image size in pixels. This is what standard DPI changers do — they only modify the metadata. However, the print size will change. If you want to keep both the same pixel dimensions AND the same print size, you'd need to add or remove pixels, which is resizing, not just DPI changing.
DPI (Dots Per Inch) refers to printer dots, while PPI (Pixels Per Inch) refers to screen pixels. Technically, DPI is for printing and PPI is for digital displays. However, in practice, people use "DPI" for both. When someone says "300 DPI image," they usually mean 300 PPI for printing purposes.
You can check image DPI by right-clicking the file and selecting Properties (Windows) or Get Info (Mac), then looking at the Details or More Info section. Alternatively, use an online metadata viewer to see DPI along with other image information.
Yes, you can and should change DPI for passport and application photos. Most government agencies require 300 DPI. Use an online DPI changer to set this, but also ensure your photo meets other requirements like dimensions, background color, and file size. Many passport photo tools include DPI setting as a feature.
300 DPI is the standard for high-resolution printing, but "high resolution" also depends on pixel dimensions. A small image at 300 DPI isn't necessarily high resolution if it doesn't have enough pixels for your print size. Both DPI and pixel dimensions matter for true high resolution.
Websites and services require 300 DPI to ensure print quality. When they print your image (for IDs, documents, photos, etc.), 300 DPI guarantees sharp, professional results. Lower DPI images may print blurry or pixelated, which is why the requirement exists.
Conclusion
Changing image DPI online doesn't have to be complicated or expensive. Whether you need to change image to 300 DPI for printing, adjust passport photos for government applications, or prepare marketing materials for professional production, free online tools make it simple.
Remember the key points:
- 300 DPI is the standard for professional printing
- Changing DPI doesn't add quality — it only changes metadata
- You can change DPI without Photoshop using free online tools
- The process works on any device — desktop, laptop, tablet, or phone
- Your images stay private and secure with browser-based processing
Next time someone tells you "your image needs to be 300 DPI," you'll know exactly what to do. Upload, select 300 DPI, download — done in seconds.
Ready to Change Your Image DPI?
Stop struggling with complicated software. Get professional 300 DPI images in seconds, completely free.
Change Image DPI Online Free →Related tools to complete your workflow: Image Resizer | Image Compressor | Metadata Viewer | Image Enhancer